
Understanding the hierarchy of controls is fundamental, but applying it effectively is where the real work begins. Too often, safety plans are just theoretical documents, or worse, place too much reliance on personal protective equipment (PPE), the least effective measure. This article moves past abstract concepts to provide practical, real-world hierarchy of control examples that you can use on your construction or manufacturing site. We focus on direct strategies that deliver measurable improvements to workplace safety.
You won't find vague theories here. Instead, you'll get a detailed breakdown of each level of the hierarchy, from elimination down to PPE. We will look at specific tactics and explain how to apply them in high-risk industrial environments. The goal is to give you a clear roadmap for identifying hazards and selecting controls that are not only compliant but genuinely effective at preventing incidents. By the end of this article, you will have a toolkit of proven methods for systematically reducing risk, moving your safety management from a reactive process to a proactive one. This approach helps create a work environment where safety is a basic part of operations, not just an afterthought.
1. Elimination
At the top of the hierarchy of controls is Elimination, the most effective method for managing workplace hazards. This strategy involves completely removing the source of the hazard, preventing any possibility of worker exposure. If the hazard doesn't exist, it cannot cause harm. Elimination isn't just about managing risk; it’s about removing it from the equation entirely.
Real-World Elimination Examples
A common example is removing asbestos from a building instead of just sealing or enclosing it. While encapsulation is a valid control, complete removal ensures no future exposure can occur if the enclosure is damaged. Another practical application is seen in manufacturing, where a company might reformulate a product to remove a toxic solvent like benzene. This permanently solves the health risks associated with that chemical.
Other useful hierarchy of control examples for elimination include:
- Automating Dangerous Tasks: Replacing a manual lifting task that poses ergonomic risks with a fully automated robotic system.
- Design-Phase Changes: Redesigning equipment so it can be maintained from the outside, removing the need for confined space entry.
- Material Removal: Stripping lead-based paint from all surfaces rather than painting over it, which prevents future exposure from chipping or dust.
Why It Works: A Practical Breakdown
Elimination offers complete and permanent protection, which is why it sits at the peak of the control hierarchy. The following infographic breaks down the core benefits of this approach.
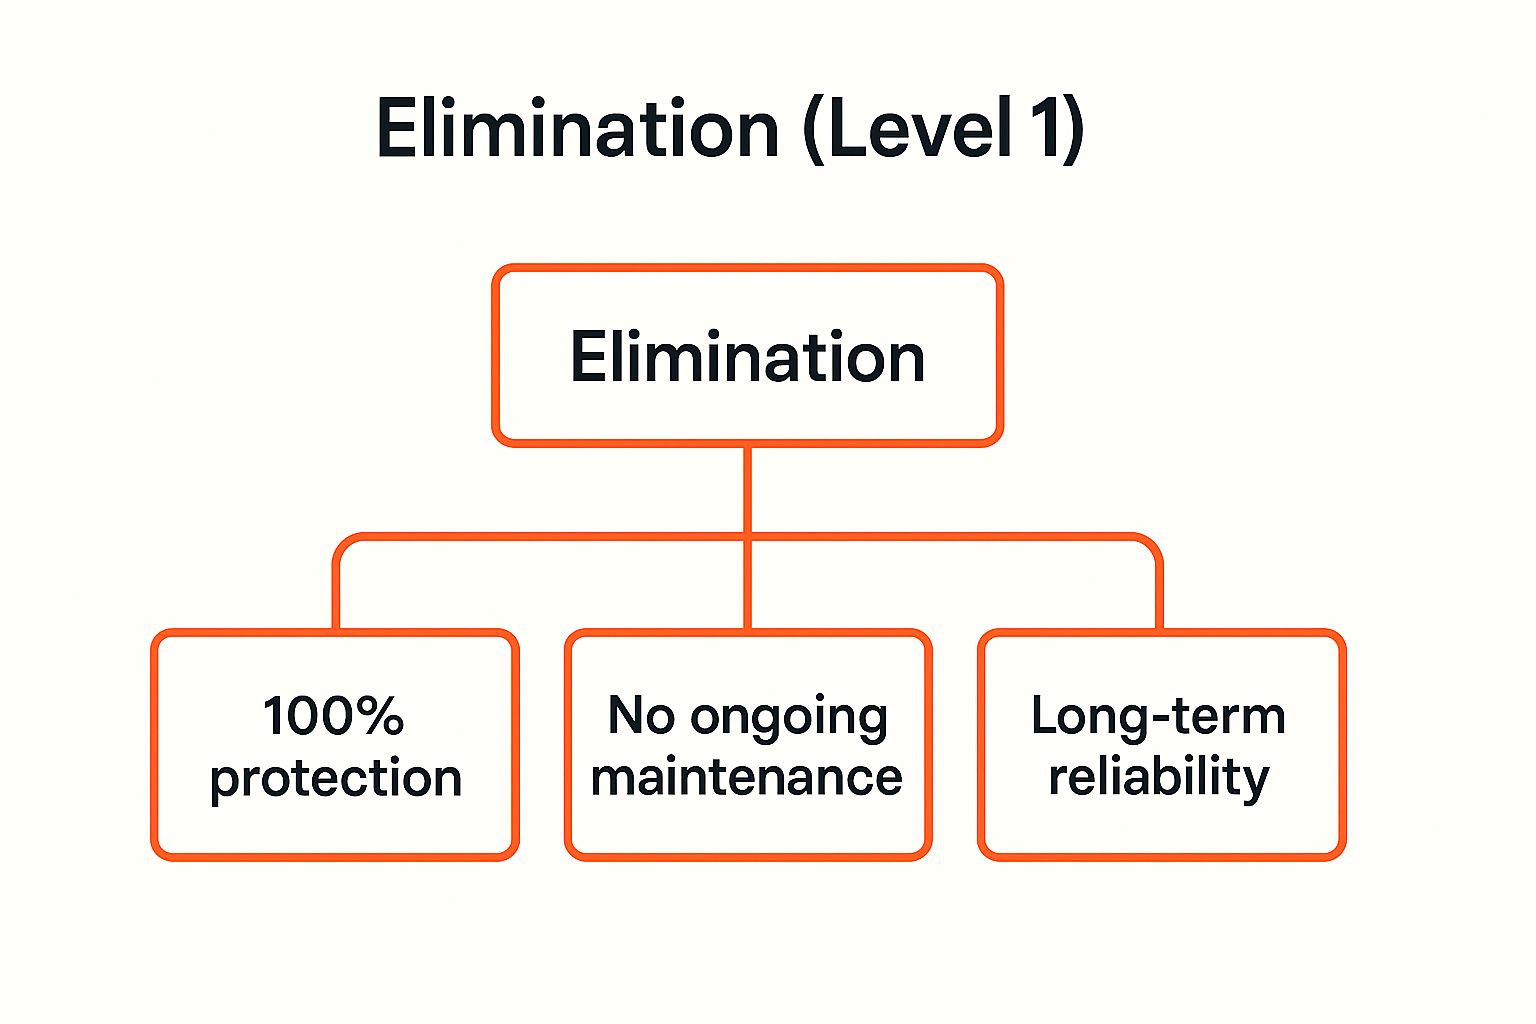
The image highlights that by removing the hazard, you get total protection and bypass the need for continuous maintenance and monitoring associated with lesser controls.
Practical Tip: While elimination can have a higher upfront cost, it often proves more cost-effective over time. Consider the total cost, which includes long-term expenses like personal protective equipment (PPE) replacement, ongoing training, and medical surveillance that are no longer needed once the hazard is gone.
This approach is best applied during the design or planning stages of a new process, facility, or product. By designing hazards out from the start, companies avoid costly retrofits later. Involve engineers, operators, and maintenance teams in risk assessments to brainstorm practical ways to eliminate hazards before work even begins.
2. Substitution
Just below elimination in the hierarchy is Substitution, the second most effective control measure. This strategy involves replacing a hazardous material, process, or piece of equipment with a less hazardous alternative. While the hazard may not be completely removed, its potential to cause harm is significantly reduced, making this a useful approach when elimination isn't possible.
Real-World Substitution Examples
A classic example of substitution is replacing highly toxic, solvent-based paints with water-based or low-VOC (Volatile Organic Compound) alternatives. This single change drastically reduces worker exposure to harmful vapors that can cause respiratory issues and long-term health problems. Similarly, in abrasive blasting, operators can substitute crystalline silica sand, a known carcinogen, with less harmful media like garnet, steel grit, or even dry ice pellets.
Other practical hierarchy of control examples for substitution include:
- Chemical Replacement: Swapping out toxic chlorinated cleaning solvents for citrus-based or bio-degradable degreasers.
- Process Change: Using mechanical fasteners like bolts or rivets instead of welding to join materials, which eliminates exposure to hazardous welding fumes.
- Equipment Upgrades: Replacing noisy, diesel-powered generators inside a workshop with quieter, electric-powered models to reduce noise exposure and exhaust fumes.
Why It Works: A Practical Breakdown
Substitution works by reducing the severity of a hazard at its source. It keeps the core function of the task but uses a safer method or material to get the same outcome. This approach lowers the risk of the job without requiring workers to adopt complex administrative procedures or rely only on PPE for their protection.
The key to successful substitution is proper vetting. It's not enough to simply swap one thing for another; the replacement must be proven to be safer and not introduce new, unexpected hazards. This involves careful research and testing before a full-scale rollout.
Practical Tip: Before implementing a substitute, always review its Safety Data Sheet (SDS) and conduct a small-scale pilot test. This allows you to assess its performance and identify any unforeseen risks in a controlled environment. A new chemical might be less toxic but more flammable, or a new piece of equipment might reduce one hazard while creating a new ergonomic one.
This control is most effective when integrated into purchasing and design processes. By establishing a policy to always seek out the least hazardous option available, companies can build safety directly into their operations. Engage with suppliers and front-line workers to identify and evaluate safer alternatives that are both effective and practical for the task at hand.
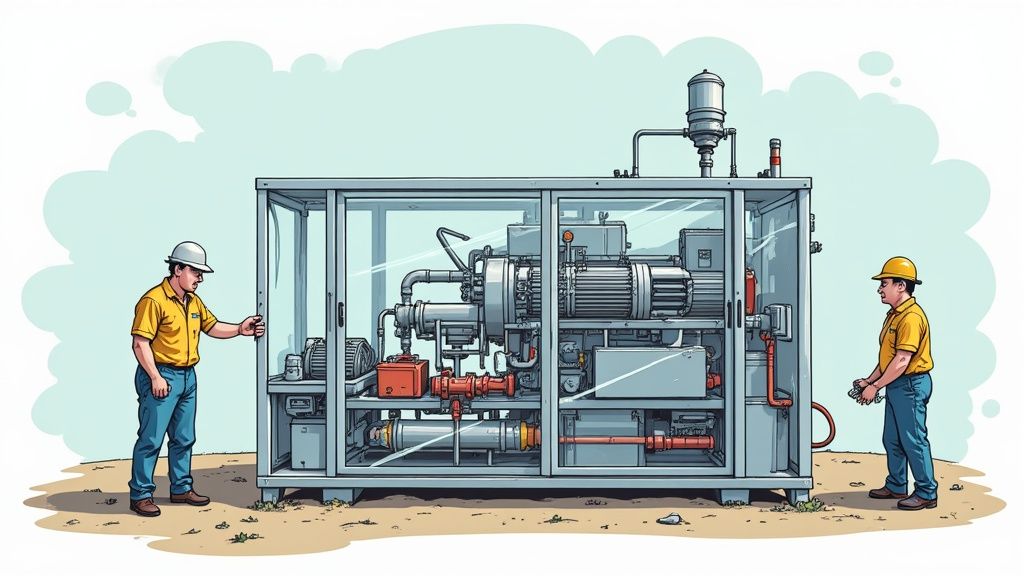
3. Engineering Controls
Positioned in the middle of the hierarchy, Engineering Controls are physical changes to the work environment or equipment that isolate people from hazards. Unlike elimination or substitution, the hazard still exists, but these controls create a physical barrier or remove the hazard from the air before it reaches the worker. This approach is highly effective because it is designed into the workplace and doesn't rely on worker behavior or supervision for its success.
Real-World Engineering Controls Examples
A classic example is installing a local exhaust ventilation (LEV) system directly over a welding station. The system’s hood captures toxic fumes at the source before they can spread into the welder's breathing zone or the general workshop. Another common application is the use of guard rails on elevated platforms or scaffolding, which physically prevents workers from falling.
Other useful hierarchy of control examples for engineering controls include:
- Machine Guarding: Installing fixed guards, interlocks, or light curtains on machinery to prevent operators from coming into contact with moving parts.
- Noise Reduction: Building sound-dampening enclosures around loud equipment like generators or compressors to reduce noise exposure in the surrounding area.
- Chemical Containment: Using fume hoods in laboratories or splash guards on chemical processing lines to contain hazardous substances.
- Ventilation Improvements: For airborne contaminants, dedicated solutions like HVAC UV light air purifiers can be integrated into existing systems to actively neutralize biological hazards, improving air quality.
Why It Works: A Practical Breakdown
Engineering controls provide a durable, physical solution that is more reliable than administrative controls or PPE. They are built to protect multiple workers at once and function continuously without direct human intervention. This makes them a fundamental part of creating a safer work environment by default. You can learn more about these practical safe workplace solutions.
Practical Tip: The most successful engineering controls are "fail-safe" or "fail-secure". This means that if the control fails (like a power outage to a ventilation fan), the equipment it protects automatically shuts down, preventing worker exposure until the control is restored.
The best time to implement engineering controls is during the initial design phase of a facility or process. This is far more cost-effective than retrofitting a solution later. Involve the workers who will operate and maintain the equipment in the design process to ensure the control is practical and doesn't create new, unforeseen problems. Regular maintenance and testing are critical to ensure these controls remain effective over their lifespan.
Worked example: automated palletizing
One plant reduced manual handling injuries by moving finished product with a conveyor and robotic palletizer instead of hand stacking at the line end.
- The hazard: Repeated heavy lifting and twisting at the packing end of the line.
- The control: Conveyors feed a robotic arm that stacks pallets for despatch, so workers no longer lift those loads in that zone.
- The outcome: The main musculoskeletal exposure on that task drops sharply because the hazardous manual step is engineered out for that path.
4. Isolation/Segregation Controls
Positioned after engineering controls, Isolation or Segregation is a highly reliable method that separates workers from hazards using physical barriers, distance, or time. Instead of removing or changing the hazard, this strategy creates a protected buffer zone. It physically prevents workers from coming into contact with a dangerous process or environment, making it an effective way to manage risks that cannot be eliminated or substituted.
Real-World Isolation Examples
A classic example is a sound-proof control room on a factory floor, which isolates an operator from dangerously high noise levels produced by machinery. Another is the use of blast shields in a laboratory or manufacturing plant to protect workers from potential explosions or high-velocity projectiles. These controls physically block the hazard’s path to the worker.
Other practical hierarchy of control examples for isolation include:
- Designated Traffic Zones: Creating clearly marked, physically separated walkways for pedestrians to keep them safe from forklifts and other moving vehicles in a warehouse.
- Time-Based Segregation: Scheduling hazardous tasks, like fumigation or high-energy equipment testing, to be performed during night shifts or weekends when fewer workers are present.
- Remote Operations: Using remote-controlled equipment to handle radioactive materials or chemicals, keeping operators at a safe distance from the exposure source.
Why It Works: A Practical Breakdown
Isolation is effective because it relies on sturdy physical barriers or deliberate separation, which are more dependable than human procedures alone. It reduces the likelihood of accidental exposure by making it physically difficult or impossible for workers to enter a hazardous area. This method contains the risk within a defined, controlled space. You can learn more about how to select effective control measures for risks here.
Practical Tip: Combine isolation with strict access controls for maximum effectiveness. For instance, a fenced-off area around a machine is good, but adding an interlocked gate that automatically shuts the machine down when opened provides a redundant layer of protection. This integration of physical and procedural controls closes potential safety gaps.
This control is best applied when the hazardous process is essential and cannot be engineered out. When designing isolation zones, it's critical to consider workflow and emergency access. Ensure that barriers do not create new hazards, such as blocking fire escape routes or preventing quick access for maintenance. Regular inspections of barriers, enclosures, and signage are essential to maintain their integrity over time.
5. Administrative Controls
Near the bottom of the hierarchy, Administrative Controls are work practices or procedures that reduce the duration, frequency, and severity of exposure to a hazard. This strategy doesn't remove the hazard but instead changes the way people work around it. It relies on policies, training, and documented procedures to guide worker actions and minimize risk.
Real-World Administrative Controls Examples
A classic example is implementing a lockout/tagout (LOTO) procedure for equipment maintenance. Before a technician can work on a machine, they must follow a strict, documented process to de-energize it, preventing accidental start-up. Another common application is a permit-to-work system for high-risk jobs like confined space entry, which ensures all safety checks are completed and authorized before work begins.
Other practical hierarchy of control examples for administrative controls include:
- Job Rotation: Creating schedules that rotate workers through different tasks to limit their exposure to ergonomic stressors or noisy environments.
- Restricted Access: Using signage and clear demarcation to prevent unauthorized personnel from entering high-hazard areas like chemical storage rooms or machine operating zones.
- Safe Operating Procedures (SOPs): Developing and enforcing step-by-step instructions for tasks like handling hazardous chemicals or operating complex machinery safely.
Why It Works: A Practical Breakdown
Administrative controls provide a framework for safe work when hazards cannot be eliminated or engineered out. They standardize processes and raise awareness, but their effectiveness depends entirely on human adherence. These controls require active participation and consistent supervision to work correctly.
They are often implemented to supplement other, more effective controls. For instance, even with engineering controls in place to reduce noise, administrative controls like mandatory hearing protection zones and limited exposure times add another layer of protection. This method is crucial for managing residual risk that remains after higher-level controls have been applied.
Practical Tip: The biggest weakness of administrative controls is their reliance on human action. Unlike an engineered guard that is always present, a procedure can be forgotten or ignored. Success requires clear documentation, consistent training, and regular audits to ensure procedures are being followed correctly and remain relevant to the work being performed.
This approach is best used for hazards that are difficult to control through other means or as an interim measure while more permanent solutions are developed. Involve your frontline workers when creating these procedures; they have firsthand knowledge of the tasks and can provide practical feedback that makes the controls more effective and easier to follow.
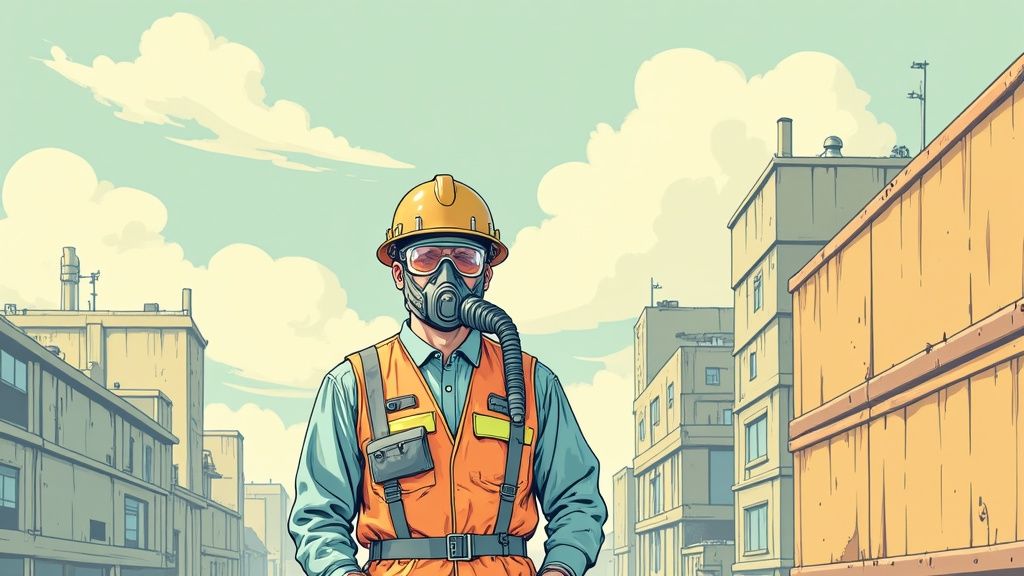
6. Personal Protective Equipment (PPE)
At the very bottom of the hierarchy is Personal Protective Equipment (PPE), the last line of defense against workplace hazards. This strategy involves providing workers with equipment to wear that creates a physical barrier between them and the hazard. PPE is considered the least effective control because it does not eliminate, substitute, or isolate the hazard itself; it only protects the individual user. Its effectiveness depends entirely on proper selection, fit, consistent use, and maintenance.
Real-World PPE Examples
A classic example is a welder using a welding helmet, heat-resistant gloves, and a leather apron. These items don't reduce the intense light, sparks, or heat generated by the welding process, but they protect the welder’s eyes, hands, and body from burns and radiation. Similarly, workers in a high-noise manufacturing facility wear earplugs or earmuffs to prevent hearing damage, even though the machinery continues to operate at hazardous noise levels.
Other common hierarchy of control examples for PPE include:
- Respiratory Protection: Using P2 respirators or dust masks in environments with airborne silica dust to prevent lung disease.
- Fall Arrest Systems: Requiring workers at height to wear a full-body harness connected to an anchor point.
- Chemical Handling: Mandating chemical-resistant gloves and safety glasses when handling corrosive liquids like acids or solvents.
- Foot Protection: Enforcing the use of steel-toed boots on construction sites to protect feet from falling objects or crushing injuries.
Why It Works: A Practical Breakdown
PPE works by creating a barrier, but it’s a fragile one. Unlike higher-level controls, the hazard remains fully present in the work environment. The protection is only effective if the equipment is used correctly 100% of the time. This reliance on individual action is its primary weakness and why it should never be the first or only control measure considered. You can find detailed information by exploring the government's official personal protective equipment requirements.
Practical Tip: Treat PPE as a final safeguard, not a primary solution. Use it to manage residual risk after all other reasonably practicable controls (elimination, substitution, engineering, administrative) have been implemented. A solid PPE program requires more than just handing out equipment; it demands rigorous assessment, training, fitting, and enforcement to be effective.
PPE is essential when hazards cannot be fully controlled by other means. For instance, during emergency response or certain non-routine maintenance tasks, exposure to a hazard may be unavoidable, making PPE the only feasible option. Always conduct a thorough hazard assessment to select the right PPE for the specific task and ensure workers are trained on its limitations, proper use, and care.
7. Machine Guarding and Safety Devices
A key type of engineering control, Machine Guarding and Safety Devices are physical barriers and systems designed to protect workers from mechanical hazards. These controls prevent contact with dangerous moving parts like gears, belts, and cutting points, effectively isolating the operator from the point of operation. This method reduces risk directly at the source without relying on worker actions.
Real-World Machine Guarding Examples
A classic example is the fixed guard covering the belt and pulley system on an industrial conveyor. The guard physically prevents hands, clothing, or tools from getting caught in the moving parts. Another common application is the light curtain on a hydraulic press brake; if the operator's hand breaks the infrared beam, the machine immediately stops, preventing a catastrophic injury.
Other crucial hierarchy of control examples for machine guarding include:
- Interlocked Doors: Large CNC machines or robotic cells often have doors with interlock switches that automatically shut down the equipment if opened during operation.
- Two-Hand Controls: These systems require an operator to use both hands to activate a machine, ensuring their hands are safely away from the danger zone.
- Emergency Stop Buttons: E-stops are a critical safety device on conveyors and other machinery, allowing anyone to shut down the equipment instantly in an emergency.
Why It Works: A Practical Breakdown
Machine guarding is highly effective because it is a "set and forget" solution that provides consistent protection. Unlike administrative controls or PPE, it does not depend on human action to be effective during normal operation. The guard or safety device is always active, providing a reliable barrier between the worker and the hazard.
Practical Tip: The most effective guards are integrated into the machine's design and are difficult to bypass. Regulations like OSHA's 29 CFR 1910.212 and standards from ANSI provide clear guidance on creating guards that are secure and functional, ensuring they do not create new hazards or obstruct work.
This approach is essential in any environment with moving machinery, from manufacturing plants to construction sites. When selecting or designing a guard, the primary goal is to make it as difficult as possible to remove or bypass. Regular inspections and lockout/tagout procedures for maintenance are critical to ensure these engineering controls remain effective over their entire lifecycle.
Hierarchy of Control Methods Comparison
| Control Measure | Implementation Complexity 🔄 | Resource Requirements ⚡ | Expected Outcomes ⭐📊 | Ideal Use Cases 💡 | Key Advantages ⭐ |
|---|---|---|---|---|---|
| Elimination | High – may require redesign, costly | High initial investment, low ongoing | 100% hazard removal, no ongoing monitoring required | New designs, feasible process changes | Complete hazard removal, long-term reliability, no failure |
| Substitution | Medium – requires evaluation, testing | Moderate to high, depending on scale | Significant risk reduction while maintaining function | When elimination isn't feasible | Safer alternatives, improved efficiency, reduced PPE need |
| Engineering Controls | Medium to high – physical/equipment changes | High capital and maintenance costs | Passive protection, protects multiple workers automatically | Most workplaces lacking elimination/substitution options | Reliable, reduces behavior dependence, cost-effective long-term |
| Isolation/Segregation Controls | Medium – combines engineering/admin | Moderate, may need additional space/time | Limits exposure via separation, hazard remains present | Radiation, biological hazards, extreme noise industries | More effective than admin alone, flexible, cost-effective |
| Administrative Controls | Low – policy and training based | Low initial cost, ongoing management | Risk reduction depends on compliance | Supplementary control, dynamic hazards | Low cost, quick to implement |
| Personal Protective Equipment (PPE) | Low – easy to implement but relies on use | Low initial cost, ongoing replacement | Individual protection only, least effective control | Temporary/emergency protection, last defense | Portable, quick deployment, necessary where others fail |
| Machine Guarding & Safety Devices | Medium to high – specialized engineering | High capital and maintenance | Prevents machinery injuries without worker intervention | Mechanical hazard environments requiring regulatory compliance | Highly effective, fail-safe designs, improves safety & efficiency |
Putting Your Hazard Control Plan into Action
Transitioning from theory to practice is the most critical step in creating a safer workplace. Throughout this article, we have explored numerous hierarchy of control examples, moving from the most effective measures like elimination to the essential last line of defence in PPE. The central lesson is clear: a solid safety strategy doesn't start with procedures or high-vis vests. It begins with a fundamental question: "How can we remove this hazard from our process altogether?"
The most effective safety managers consistently challenge their teams to think higher up the hierarchy. Instead of simply writing a new safe work method statement (SWMS) for a hazardous task (an administrative control), they ask if the task can be eliminated through prefabrication or if a safer chemical can be substituted. This mindset shift is the difference between managing risk and actively reducing it.
Key Takeaways for Your Workplace
To make these concepts stick, let’s boil down the core principles:
- Always Aim High: Start every risk assessment by exploring elimination and substitution. Force yourself to document why these higher-level controls are not reasonably practicable before moving down the list. This creates a powerful paper trail and encourages genuine problem-solving.
- Don't Settle for Admin & PPE: Administrative controls and PPE are necessary, but they rely on consistent human actions, which are fallible. They are the least reliable methods because they are the most likely to fail. Use them to manage residual risk, not as your primary solution.
- Integrate Controls into Operations: The best controls don't feel like a separate 'safety' task; they are built into the workflow. An engineered guard is part of the machine, a less toxic solvent is just 'the solvent we use'. When safety becomes part of the standard operating procedure, it becomes more reliable and effective.
- Document and Verify Everything: An implemented control is only effective if it's maintained and understood. This means clear documentation, regular inspections, and training for your team. This process is closely related to the principles of Quality Assurance in Manufacturing, where consistent checks and verification are vital to a successful outcome.
Mastering the hierarchy of controls is not just about compliance. It’s about building a more resilient, efficient, and fundamentally safer operation. By systematically applying these hierarchy of control examples to your own site-specific hazards, you move beyond ticking boxes and start building a workplace where your team is genuinely protected. This proactive approach prevents incidents, reduces downtime, and demonstrates a real commitment to your workers' wellbeing, leading to a stronger, more productive company.
Ready to manage your hazard controls more effectively? Safety Space provides a centralised platform to document risk assessments, track control measures, and manage safety documentation across all your projects. Stop juggling spreadsheets and start building a safer, more organised workplace today. Find out more at Safety Space.
Ready to Transform Your Safety Management?
Discover how Safety Space can help you build a safer, more compliant workplace with our comprehensive safety management platform.
Book a Free DemoRelated Topics
Permit to Work (PTW) System
When the hierarchy of controls leaves residual risk on a high-hazard task, a permit-to-work system is the next safeguard. See the 6 PTW types and process.
Risk Management Matrix
Pair the hierarchy of controls with a 5×5 risk matrix to prioritise where to apply each control level. Includes a worked example and template.
Hazard Identification
Before you can apply the hierarchy of controls you need to identify the hazard. Walk through the 4-step hazard identification process.
Hierarchy of Control Measures
A deeper read on each individual control measure — how to choose between elimination, substitution, engineering, administrative, and PPE in real situations.