
The hierarchy of controls WHS isn't just a list of suggestions; it's a structured, step-by-step system for dealing with risks in the workplace. It's designed to make you tackle the root cause of a problem, not just the symptoms.
At its core, the hierarchy makes you prioritize actions that physically remove or reduce hazards over those that just rely on people remembering to follow a rule. It's the foundational game plan for keeping people safe, especially in high-risk fields like construction and manufacturing.
What Is the Hierarchy of Controls, and Why Does It Matter?
Think of the hierarchy of controls as an upside-down pyramid. The most effective, reliable methods for controlling risks are at the wide top. The least effective options, the ones you should only ever use as a last resort, are at the narrow point at the bottom.
This isn't just good practice; it’s a non-negotiable part of workplace safety in Australia.
The whole point is to shift safety thinking from reactive to proactive. Instead of just slapping a "Warning" sign on a machine or handing out hard hats and hoping for the best, the system makes you ask much smarter questions first.
Can we get rid of this dangerous process entirely? Can we switch to a safer chemical? Can we install a permanent guardrail so nobody can possibly fall? It's about designing a fundamentally safer workplace, not just layering on temporary fixes.
This structured approach is the key to moving beyond simply responding to incidents and instead preventing them from ever happening. If you want to get better at spotting these issues, our guide on recognising hazards in the workplace is a great place to start.
The 6 Levels of Control
The hierarchy is built on six distinct levels. The golden rule is to always start at the top (most effective) and work your way down. You can’t just jump to the easiest option.
Here’s a quick look at how the levels stack up, from most to least effective:
The WHS Hierarchy of Controls provides a clear roadmap for managing workplace risks. It's important to follow the levels in order, starting with the most effective methods first. Jumping straight to the bottom, like issuing PPE, without considering higher-level controls first is not only less effective but often fails to meet legal duties.
| Control Level | What It Means | Simple Example |
|---|---|---|
| Elimination | Get rid of the hazard completely. | Working at ground level to avoid the risk of falling from height. |
| Substitution | Replace the hazard with a safer option. | Using a water-based paint instead of a solvent-based one. |
| Isolation | Physically separate people from the hazard. | Putting noisy machinery inside a soundproof enclosure. |
| Engineering | Use equipment or design changes to reduce risk. | Installing a guard on a machine's moving parts. |
| Administration | Change how people work through procedures or training. | Implementing safe work procedures or putting up warning signs. |
| Personal Protective Equipment (PPE) | Protect the individual with safety gear. | Requiring workers to wear gloves, goggles, or a hard hat. |
This sequence is non-negotiable for a reason. The controls at the top of the list are far more reliable and can protect an entire team at once. In contrast, controls at the bottom, like PPE, only protect one person and depend entirely on that individual using it correctly every single time, without fail.
A Core Part of Australian WHS Law
Make no mistake, understanding and applying this framework is a central legal requirement in Australia.
The Work Health and Safety Act 2011 formally established the hierarchy as the go-to method for managing risks. Government bodies like Safe Work Australia consistently reinforce that every business must work through these levels to meet their legal obligations.
As WorkSafe Victoria points out, elimination offers the highest level of protection, while PPE is the least reliable. This legal and practical reality makes a solid grasp of the hierarchy of controls WHS absolutely essential for running a safe and compliant business.
You can discover more insights on the WorkSafe Victoria website to see these official guidelines in more detail.
Scenario: after-hours site access
Take one problem—unauthorised entry to an active construction site overnight—and run it through the tiers in order.
- Elimination: Build major assemblies off-site in a controlled factory so less open, tempting site edge exists at grade.
- Substitution: If the address must stay, choose a layout that reduces easy climb-in points compared with a wide open boundary.
- Isolation / engineering: Fixed fencing, lockable gates, and clear pedestrian/vehicle separation.
- Administration: Access rules, inductions, and signage. They help only when people see them and follow them.
- PPE: A security guard's high-vis and torch do not remove the trespass hazard; they protect one person at most.
Breaking Down Each Control with Real World Examples
Understanding the theory behind the hierarchy of controls is one thing, but seeing it in action makes it stick. The best way to really get your head around how each level works is to apply it to real-world scenarios you’d find on any Australian job site.
The goal is always the same: start at the top with the most effective solutions before you even think about moving down the list.
This diagram shows the core principle perfectly. Think of it as an upside-down pyramid, with the most powerful and reliable controls sitting right at the top.
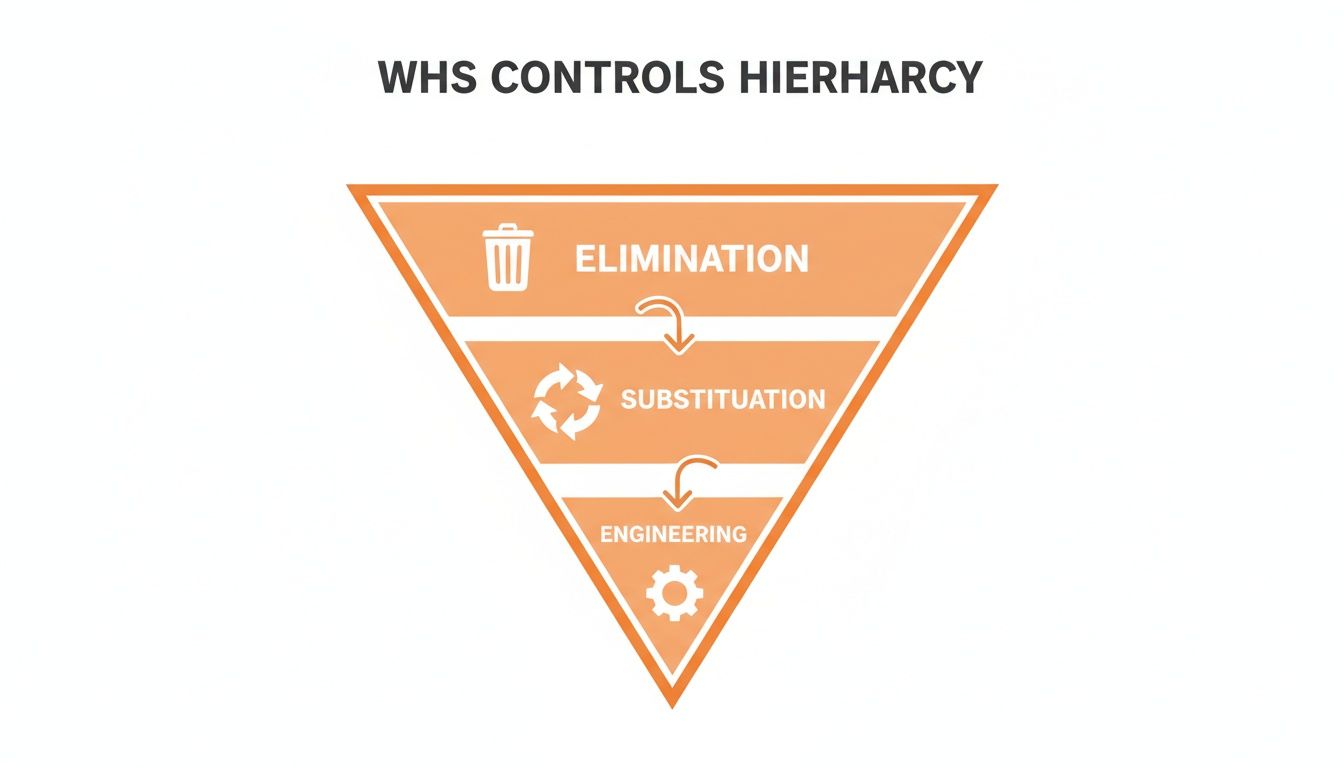
It’s clear from the visual that the most foolproof safety measures, like elimination, are always given the highest priority.
Level 1: Elimination
Elimination is the absolute gold standard in workplace safety. It’s not about managing risk; it’s about getting rid of the hazard completely, so the risk drops to zero. You’re not just controlling the danger, you’re making sure it can't exist in the first place.
This is most powerful when it’s done right at the start, in the design and planning stages of a project, long before anyone even sets foot on site.
Construction Example: A classic example is designing out the need to work at heights. Instead of having carpenters build wall frames piece by piece on the second storey, the frames are prefabricated on the ground and then craned into place. This completely removes the fall hazard for the crew who would have otherwise been working in a dangerous spot.
Manufacturing Example: A factory notices a spike in back injuries from workers manually lifting heavy steel plates. The fix? They bring in an automated conveyor and robotic arm system that moves the plates from storage to the cutting machine. The manual handling hazard is now completely gone.
Level 2: Substitution
When you can't eliminate a hazard entirely, the next best move is Substitution. This is all about swapping out a hazardous material, process, or piece of equipment for a safer alternative that still gets the job done.
The trick here is to make sure your new solution doesn't accidentally introduce a different, unexpected hazard.
Manufacturing Example: A metal fabrication workshop has been using a powerful, toxic industrial solvent to clean machine parts, and workers are reporting headaches from the fumes. After a review, the business switches to a safer, water-based degreaser. It’s non-toxic but still cleans effectively, reducing the risk of chemical exposure.
Construction Example: A demolition crew needs to break up an old concrete slab. Instead of using deafening, vibration-heavy jackhammers, they opt for a chemical demolition agent that silently fractures the concrete. This substitutes the high-risk noise and vibration hazards with a much lower-risk chemical application.
Level 3: Isolation
If you can't get rid of the hazard or swap it out, you need to physically separate people from it. That's Isolation. It means putting a solid barrier in place that stops workers from coming anywhere near the danger.
A locked gate or a solid barrier works the same way for every single person, every single time. A good isolation control keeps people out of harm's way, no matter what they do.
Manufacturing Example: A factory has a massive stamping press with powerful moving parts that could cause serious crush injuries. The solution is to install a fixed physical guard around the entire machine with an interlocked gate. If that gate is opened, the machine automatically powers down, isolating workers from the hazard.
Construction Example: An excavation crew digs deep trenches on a busy site. To prevent people, vehicles, or materials from falling in, the entire trench perimeter is fenced off with temporary construction fencing. This physically isolates the fall hazard from everyone else working on the site.
Level 4: Engineering Controls
Engineering controls are about making physical changes to the workplace, equipment, or process to make things safer. They’re designed to remove or reduce the hazard right at its source, before it can even reach a worker.
These are highly reliable controls because they are literally built into the work environment itself. For a deeper look into different types of controls, our article on real-world hierarchy of control examples offers even more scenarios.
Manufacturing Example: The welding bays in a workshop are producing harmful fumes. To control this breathing hazard, a local exhaust ventilation (LEV) system is installed directly over each welding bay. The system sucks the fumes away at the source and ducts them outside before they can enter the welder's breathing zone.
Construction Example: A circular saw used for cutting timber kicks up a lot of dust and has an obviously dangerous spinning blade. An engineered control is to fit the saw with an integrated dust extraction port connected to an industrial vacuum. At the same time, a self-retracting blade guard automatically covers the blade when not in use. In a different context, like a home, specific hazard controls such as knowing how to test for carbon monoxide in your home are important for immediate safety.
Level 5: Administrative Controls
As we get near the bottom of the hierarchy, we find Administrative controls. These focus on changing the way people work through procedures, training, and signs. While they are often necessary, they’re considered less reliable simply because they depend on every person following the rules correctly, every single time.
Construction Example: Crane operations are inherently high-risk. An administrative control is to develop a detailed Safe Work Method Statement (SWMS) that spells out every step of a lift, including exclusion zones, communication signals, and pre-start checks. Every person involved must be trained on this procedure.
Manufacturing Example: To limit a worker's exposure to hand-arm vibration from using power tools, a manager introduces job rotation. Workers now spend only an hour on a tool before rotating to a different task, ensuring their total daily exposure stays well below the safe limit.
Level 6: Personal Protective Equipment (PPE)
Sitting right at the bottom as the final and least effective line of defence is Personal Protective Equipment (PPE). This is the gear worn by a worker to protect them from a hazard. It does absolutely nothing to remove, substitute, or isolate the hazard itself; it only puts a barrier on the person.
PPE should only ever be used after all higher-level controls have been put in place, or as a final backup measure.
Construction Example: Even with guardrails installed (engineering control) and safe work procedures in place (administrative control), there's still a residual risk of something falling from above. The mandatory use of hard hats provides that last layer of protection for every person on site.
Manufacturing Example: Workers in a machine shop are required to wear safety glasses with side shields. This protects their eyes from flying metal shavings, a risk that still exists even after machine guarding (isolation) is installed.
How to Select and Implement the Right Controls
Knowing the hierarchy of controls is one thing; actually using it to make smart decisions on-site is what keeps people safe. The process doesn’t need to be complicated. Think of it as a logical, step-by-step path that helps you choose the most effective control and, just as importantly, justify why you’ve chosen it.
This whole process kicks off with a solid risk assessment. You can't control a hazard until you understand it inside and out. It’s a non-negotiable first step that lays the foundation for every decision you make afterwards. To nail this, you need to understand how to do a risk assessment properly and start on the right foot.
Once you’ve identified a hazard, you simply work your way down the hierarchy, one level at a time, asking a series of questions. This isn't just a mental exercise, it's a critical part of your WHS compliance that creates a clear, defensible record of your decision-making.
Step 1: Start at the Top with Elimination
The first and most powerful question is always the same: Can we completely eliminate this hazard?
Forget about budgets or convenience for a moment. The question is purely about what’s possible. Can you change the process, redesign the workspace, or alter the location to make the hazard disappear entirely?
- If Yes: Fantastic. You’ve found the best possible solution. Document how you'll eliminate the hazard and get it done.
- If No: This is where documentation is key. You must record why elimination isn't reasonably practicable. Is it a core, unchangeable part of the process? Is the technology simply not available? A vague "it's too hard" won't cut it; you need a solid operational reason.
For instance, if the hazard is working at height to install windows, elimination would mean figuring out a way to install them from the ground. If the building's design makes that physically impossible, you document that fact and move to the next level down.
Step 2: Consider Substitution and Isolation
If elimination is off the table, your next questions are about either replacing the hazard or physically separating people from it.
Ask these questions in this specific order:
- Can we substitute the hazard with a safer alternative? Think about swapping a toxic chemical for a non-toxic one, or replacing a noisy, vibrating piece of equipment with a quieter, modern model.
- If substitution isn't possible, can we isolate the hazard? This means putting a physical barrier between the hazard and your workers. Machine guarding, soundproof enclosures, and fenced-off areas are all classic examples of isolation.
The process for each question is the same. If you can do it, document the plan. If you can't, record a clear justification for why it's not reasonably practicable before you even think about lower-level controls. This paperwork is your proof that you’ve followed the correct, legally required process.
Step 3: Move to Engineering and Administrative Controls
Only after you’ve ruled out elimination, substitution, and isolation should you move down to engineering and administrative controls. These are about modifying equipment or changing the way people work, and they almost always go hand-in-hand.
The key difference here is that you're no longer removing the hazard itself. You're now focused on reducing the risk that the hazard presents. This is a critical distinction in the WHS framework.
Your decision-making continues with these questions:
- Can we apply an engineering control? This could be adding local exhaust ventilation to capture dust at the source or installing guardrails to prevent falls from height.
- What administrative controls are needed? This is where you bring in safe work procedures, deliver specific training, implement job rotation to limit someone's exposure, or put up clear warning signs.
Let's be real, most situations will require a mix of these controls to manage the risk properly. It's rare that just one will be enough.
Step 4: Involve Your Team in the Process
Under Australian WHS law, you have a legal duty to consult with your workers and their Health and Safety Representatives (HSRs) when making decisions about safety. This isn't just about ticking a box; it's about tapping into the best source of practical, on-the-ground knowledge you have.
Your workers are the ones dealing with these hazards every single day. They often have the most practical and workable ideas for what will actually be effective.
Your consultation should cover:
- Identifying the hazards in the first place.
- Assessing the risks they present.
- Brainstorming and discussing potential control measures.
- Getting feedback on whether proposed controls are practical and won't just create new, unforeseen problems.
This kind of collaboration not only leads to better safety outcomes but also makes it far more likely that the controls you choose will actually be used correctly. Documenting this consultation process is another vital piece of your compliance puzzle.
By systematically working through these steps, you turn the hierarchy of controls from a poster on the wall into a practical and legally sound tool for making your workplace genuinely safer.
Why Combining Controls Is Your Strongest Defence
Relying on a single control measure to manage a serious workplace hazard is a bit like using one flimsy padlock to protect a bank vault. It might look like you're doing something, but it leaves you dangerously exposed. In complex and fast-moving environments like a busy construction site or a manufacturing plant, a single point of failure is a risk you simply can't afford.
This is why the best way to apply the hierarchy of controls WHS is to layer multiple controls. Think of it as creating a series of barriers. If one control fails or just isn't enough on its own, another is already in place to pick up the slack, creating a far more robust and resilient safety system.
Creating Defence in Depth
This idea of layering controls is often called "defence in depth." Instead of putting all your faith in one solution, you build a multi-layered defence that tackles the hazard from several angles. It’s a practical approach that acknowledges a simple truth: no single control is ever perfect, especially the lower-level ones that rely on someone remembering to do the right thing.
A single control is often brittle. For example, if your only control is a warning sign (an administrative control), its effectiveness plummets the moment someone doesn't see it, read it, or understand it. But if you combine that sign with a physical guardrail (an engineering control), you’ve built a much more reliable system.
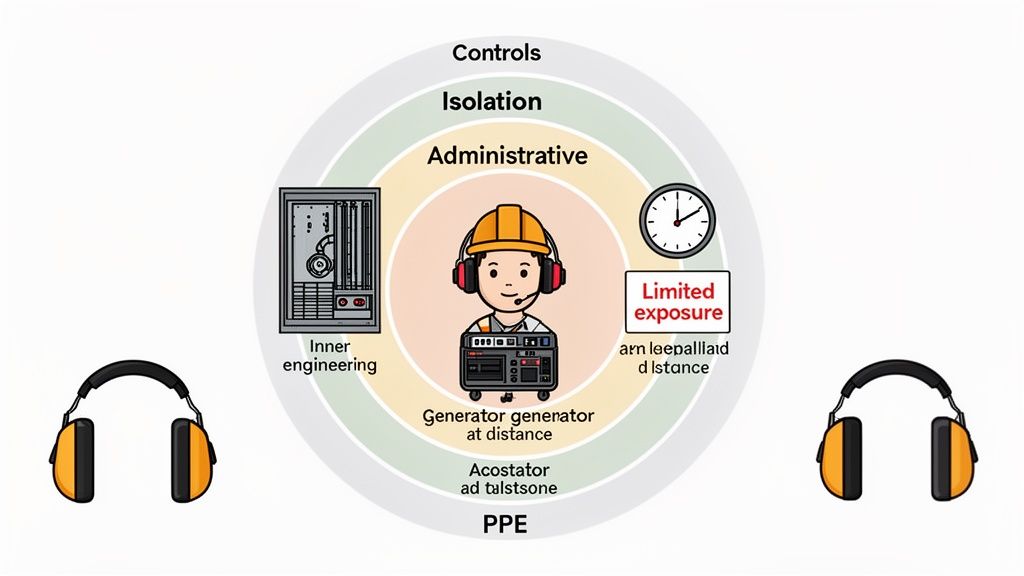
A Practical Scenario: Noise Control
Let's look at a common hazard on plenty of worksites: a loud, diesel-powered generator. Just handing out earmuffs and hoping for the best is a weak strategy. What happens if a worker forgets them, wears them incorrectly, or they’re damaged?
A multi-layered approach gives you a much stronger solution. Here’s how you could stack controls from different levels of the hierarchy:
- Engineering Control: Place the generator inside a custom-built acoustic enclosure to dampen the sound at its source.
- Isolation Control: Position the enclosed generator as far away from the main work areas as possible.
- Administrative Control: Implement job rotation, limiting the amount of time any single worker has to spend near the generator.
- PPE: As the final line of defence, require anyone entering the designated generator area to wear hearing protection.
In this scenario, even if one control falls short, the other layers are still working to protect your team. You've built a system that's far more dependable than just handing out earmuffs and hoping for the best.
Applying Layered Controls to High-Risk Tasks
This method is absolutely critical for high-risk activities. We’ve seen time and again that implementing multiple control levels leads to measurable safety improvements in Australian industrial operations. In fact, applying a series of controls from several hierarchy levels is directly associated with a decreased risk for work injury.
Take concrete cutting, for example. To protect workers from flying debris, Australian workplaces will typically implement a combination of controls: isolating the work area, using proper saw blade guarding, and providing personal protective equipment like face shields. This multi-layered approach comes from understanding that no single control provides complete protection, particularly in high-risk manufacturing and construction environments. You can get more information on how different safety controls work together from this detailed analysis.
The goal is to make safety the default outcome. A well-layered system of controls means that even if a worker makes a mistake, the engineering and isolation controls are still in place to prevent an incident.
By combining controls, you shift away from a reactive, person-dependent safety model. Instead, you create an environment where hazards are managed systematically and reliably, making the entire workplace safer for everyone, every single day. It's the most practical and effective way to apply the hierarchy of controls WHS framework.
Common Mistakes to Avoid When Applying the Hierarchy
Getting the hierarchy of controls WHS framework right is a legal duty, but it’s surprisingly easy to fall into common traps that gut its effectiveness. These mistakes usually pop up when you're looking for a quick fix or just misjudging the real cost of a hazard. Sidestepping them is vital if you want to create a workplace that’s genuinely safe and can stand up to scrutiny.
One of the biggest blunders is jumping straight to the bottom of the hierarchy. It’s a shortcut that can have serious consequences.
The PPE-First Fallacy
The most common mistake we see is defaulting to Personal Protective Equipment (PPE) as the first and only solution. It feels easy, right? Just hand out some hard hats, gloves, or earplugs. But this approach completely misses the point of the hierarchy.
PPE does absolutely nothing to control the hazard itself; it just puts a fragile barrier between it and a person. It relies 100% on correct and consistent use, which is a massive, unreliable point of failure.
Think about the hidden costs. A one-time engineering fix, like installing a guard on a machine, has a clear upfront price tag. PPE, on the other hand, is the gift that keeps on taking. It requires ongoing investment in:
- Training: Workers need to know how to select, fit, use, and maintain their gear properly.
- Replacement: PPE wears out, gets damaged, or expires. It’s a constant cycle of re-purchasing.
- Supervision: Managers have to constantly be on the lookout to ensure people are actually using their PPE correctly.
These recurring costs snowball, often making the "cheaper" option far more expensive in the long run.
Creating Overly Complex Procedures
Another classic pitfall is leaning on administrative controls that are way too complicated. A 50-page Safe Work Method Statement (SWMS) that no one reads or understands is just shelf-ware. It's useless. When procedures are confusing, long-winded, or just plain impractical, workers will inevitably find shortcuts. It’s human nature.
Effective administrative controls have to be clear, concise, and directly relevant to the task. If a worker can't grasp the procedure in a few minutes, it’s not a control; it's a compliance document that fails to manage risk.
The fix? Involve the workers who actually do the job when you're writing the procedures. They know the practical steps, the sticking points, and how to create a process that is both safe and workable.
Forgetting to Review and Consult
Putting a control in place isn't a "set and forget" activity. A major mistake is failing to review controls after an incident, when a process changes, or even just over time. A control that worked a year ago might be totally inadequate today because of new equipment, different site conditions, or a hundred other small changes.
Just as bad is neglecting your legal duty to consult with your team. The people on the ground have priceless insights into what’s working and what isn’t. Ignoring their input not only leads to weaker controls but also blows a critical compliance step.
Common Pitfalls vs Better Practices
To bring it all together, here’s a quick look at these common mistakes and how to flip them into good practice.
| Common Mistake | Why It's a Problem | What to Do Instead |
|---|---|---|
| Jumping straight to PPE | Fails to address the source of the hazard and relies entirely on human behaviour. It's the least effective control. | Always start at the top of the hierarchy. Justify in writing why you can't eliminate, substitute, or engineer out the risk first. |
| Failing to review controls | Work environments change, and controls can become less effective over time, creating a false sense of security. | Schedule regular reviews of all control measures, especially after an incident or when a process is modified. |
| Ignoring worker consultation | You miss out on practical, frontline knowledge and fail to meet a key legal requirement under WHS law. | Actively involve workers and their Health and Safety Representatives when identifying hazards and choosing controls. |
By consciously avoiding these errors, you can make sure your application of the hierarchy of controls WHS is not just a paper-shuffling exercise but a powerful, practical tool for keeping your people safe.
Ditching the Paper Trail: Managing Your Controls with a Digital System
Applying the hierarchy of controls consistently is a huge challenge when you're juggling paper forms, messy spreadsheets, and multiple job sites. Let's be honest, it’s almost impossible to know if a control measure you documented three months ago is still doing its job today. This is where manual systems really fall short.
When you're relying on a paper trail, it's incredibly difficult to track reviews, assign tasks, and get a clear, real-time picture of your company's risk profile. Important details get lost, and accountability becomes blurry when the records are stuck in a filing cabinet or a forgotten folder on a shared drive.

Making Controls Reliable and Visible
This is where a digital safety management system comes in. It’s the practical way to put the hierarchy of controls into consistent action, every single day. It shifts your safety processes from being static documents to a live, interactive system that gives you total visibility.
With a platform like Safety Space, you can actually make it all work:
- Document everything in one place: Link your risk assessments directly to the control measures you’ve chosen. This creates a crystal-clear and auditable record of why you did what you did.
- Assign clear accountability: Make a specific person responsible for implementing and maintaining each control, with a clear due date. No more guessing who was meant to do it.
- Schedule automatic reviews: Set up recurring reminders to make sure controls are regularly checked and are still effective. It takes the "I forgot" factor out of the equation.
This approach transforms your safety plan from a document that gathers dust into a dynamic, working tool. Instead of just writing down your good intentions, you’re actively managing the entire lifecycle of a control measure, from the moment it's implemented to its regular review.
The real game-changer with a digital system is turning compliance into action. It gives managers a simple dashboard view of what’s working, what’s overdue, and where the biggest risks are, ensuring nothing slips through the cracks.
Ultimately, it just makes it simpler to manage your WHS duties effectively. You can be confident that the controls you’ve chosen aren't just documented, but are actively protecting your team out on site.
Frequently Asked Questions
When you start applying the hierarchy of controls WHS framework on the ground, the theory quickly meets reality. It’s natural for practical questions to pop up. Here are some straight answers to the most common queries we hear from managers and supervisors.
Is It Ever Okay to Just Use PPE?
Almost never. Under Australian WHS law, your first obligation is always to aim for higher-level controls, things like elimination or engineering solutions. PPE should only be your sole line of defence when all other options are not reasonably practicable.
Think of it as a last resort, or maybe a temporary fix while you get a more permanent, effective control in place. Most of the time, its real job is to supplement other controls, not replace them. Relying only on PPE is a classic compliance mistake because it’s the least reliable way to protect your people.
How Often Should We Review Our Controls?
Your controls aren't a "set and forget" solution. You need to review them regularly to make sure they’re still working as intended. The law actually requires a review if a new hazard pops up or if an existing control is clearly failing.
A review is also mandatory after a workplace incident, or even when your team tells you during consultation that a control isn't cutting it anymore. A good rule of thumb is to build this into your routine, schedule formal reviews as part of your safety management system, maybe annually for your high-risk tasks.
What Does Reasonably Practicable Actually Mean?
"Reasonably practicable" is one of those legal terms that can feel a bit fuzzy, but the concept is straightforward. It’s about doing what is reasonable in your specific situation to manage a risk. This involves a balancing act, weighing the risk itself against what it would take to control it.
The factors you need to consider are:
- How likely is it that the hazard will cause harm?
- How severe could that harm be?
- What do you know (or what should you know) about the hazard and the ways to fix it?
- Are there suitable control measures available?
- What’s the cost of the control? (This is weighed against the risk).
It's all about proportionality. A very high-risk situation, like one with the potential for a fatality, demands a much greater investment of cost and effort to control than a minor one. You can't just cite cost as a reason not to implement a control, unless that cost is grossly disproportionate to the risk you’re trying to manage.
Stop chasing paper and start managing safety effectively. Safety Space gives you the digital tools to document, track, and review your controls, ensuring your team is protected and your business stays compliant. See how it works and book a free demo today.
Ready to Transform Your Safety Management?
Discover how Safety Space can help you implement the strategies discussed in this article.
Explore Safety Space FeaturesRelated Topics
Safety Space Features
Explore all the AI-powered features that make Safety Space the complete workplace safety solution.
Articles & Resources
Explore our complete collection of workplace safety articles, tools, and resources.