
A risk assessment is simply a structured way of spotting hazards on-site, figuring out how serious they are, and putting the right controls in place to stop anyone from getting hurt. It’s the foundation of good health and safety management, helping you proactively prevent injuries before they happen.
Why Risk Assessments Are Non-Negotiable
Let's be blunt. Skipping or rushing a risk assessment isn't just cutting a corner; it's a direct gamble with your people, your projects, and your bottom line. In high-stakes industries like construction and manufacturing, the fallout from getting this wrong is severe and immediate. This isn't about paperwork; it's about keeping your operation running.
A single overlooked hazard can bring a multi-million dollar project to a grinding halt. Think about the real-world costs of an incident:
- Work stoppages and site shutdowns ordered by regulators.
- Hefty fines and potential legal action for non-compliance.
- Damaged equipment and materials leading to budget blowouts.
- Project delays that put contracts and client relationships on the line.
These aren’t hypotheticals. They are the practical, day-to-day outcomes that operations managers and business owners face when risk management is treated as an afterthought.
More Than Just a Legal Box to Tick
While meeting your legal duties under Australian Work Health and Safety (WHS) laws is crucial, the real value of a proper risk assessment goes much deeper. It’s a core business activity that directly supports your operational efficiency. By systematically identifying what could go wrong, you can build smarter, more resilient ways of working.
The unfortunate reality is that workplace incidents are far too common. In a recent year, 188 Australian workers died from traumatic injuries on the job. The data shows that 42% of these deaths involved vehicles and 13% were from falls from heights—both everyday scenarios in industrial settings. Digging into these statistics shows exactly where our focus needs to be.
A proactive risk assessment is your first line of defence. It allows you to find and fix issues like unsafe scaffolding, inadequate traffic management, or poor chemical handling before they lead to a serious incident.
Linking Safety to Business Success
When you look at risk assessments through an operational lens, their importance becomes crystal clear. A well-executed assessment helps you put your resources where they’re needed most, directing attention and funds to the areas with the highest potential for disruption.
For those dealing with specific hazards like chemicals, finding a structured method is key. A helpful resource is this practical guide to systematic chemical risk assessment, which outlines a clear method. This kind of systematic approach removes guesswork and builds a reliable framework for protecting your team and your operations from costly mistakes.
Ultimately, a consistent approach to risk assessment is a direct investment in business continuity and profitability.
How to Prepare for Your Risk Assessment
A solid risk assessment starts long before you even set foot on the factory floor or construction site. Going in without a plan is a sure way to miss critical hazards, get sidetracked, and waste everyone's time. A little prep work organises the whole process, making sure you look in the right places and talk to the right people.
Think of it like getting your tools and blueprints together before you start building. You need to know what you’re building, who’s on the crew, and what materials you have. The same logic applies here. A bit of groundwork makes the actual assessment far more effective and less of a headache.
Assemble the Right Team
A risk assessment should never be a solo mission conducted from behind a desk. If you want a real picture of the risks involved in any job, you have to get input from the people who actually do the work. Their hands-on experience is gold.
Your team should bring together a mix of perspectives:
- Frontline Workers: These are the people who know the undocumented workarounds, the frustrating quirks of the equipment, and the real-world pressures of their tasks.
- Supervisors or Team Leaders: They act as a bridge between management’s goals and the reality on the floor, understanding both production targets and safety procedures.
- Maintenance Staff: This crew has unique insights into machinery failures, recurring problems, and the true condition of your plant and equipment.
- Health and Safety Representatives (HSRs): If you have them, HSRs are a vital resource. They're formally trained to represent their colleagues on safety matters and bring a structured perspective.
Involving a diverse group like this means you're not just assessing the 'by the book' process. You're assessing what really happens on a busy Tuesday afternoon when things are hectic.
Gather Your Essential Documents
Before you start your walk-through, it's time to do some digging. Pull together all the relevant paperwork you can find. These documents tell the story of what’s been happening on-site, often pointing you straight to recurring problems or previously identified hazards. Going in without this info is like working with one eye closed.
For a more focused look at how to approach safety in smaller enterprises, explore this practical guide to risk assessment for small business.
A key goal of preparation is to understand past failures and existing procedures. Your documents tell a story about what has already gone wrong and what is supposed to be happening.
Start by collecting these essentials:
- Incident and Near-Miss Reports: This is your treasure map. These reports show you exactly where your systems have failed before, pointing directly to high-risk areas that need immediate attention.
- Previous Risk Assessments: Don't reinvent the wheel. Reviewing past assessments shows you what was identified before, letting you check if the controls are still in place and, more importantly, if they're actually working.
- Safe Work Method Statements (SWMS): For any high-risk construction work, the SWMS is your non-negotiable starting point. Your assessment should verify that the work is happening exactly as described in the statement.
- Plant and Equipment Manuals: These often-ignored booklets contain crucial safety information straight from the manufacturer, including operating limits and mandatory maintenance schedules.
- Maintenance Logs and Records: Are you actually keeping up with scheduled servicing? A poorly maintained machine is a massive hazard, and these logs will tell you whether maintenance is being done correctly and on time.
If you’re just starting to formalise your approach, getting a clear structure is key. You can find more detail and structure in our guide to creating a risk assessment plan template at https://safetyspace.co/risk-assessment-plan-template.
Set a Clear Scope
Finally, you need to define exactly what you are assessing. Are you looking at a single piece of machinery, a complete production line, or an entire construction site? If you try to assess everything at once, you’ll end up with a vague report that isn’t useful to anyone.
Get specific. For example, instead of a fuzzy goal like "assess the workshop," a much better scope would be "assess the risks associated with operating the metal press, including material handling and routine maintenance." This sharp focus makes the risk assessment at your workplace manageable and leads to specific, actionable results you can actually implement.
Finding and Documenting Workplace Hazards
Alright, you've done the prep work. Now it’s time to get your boots on the ground and start spotting the hazards. This is the active, hands-on part of any risk assessment at your workplace, where you methodically hunt for anything with the potential to cause harm.
The goal isn't just to tick off the obvious stuff. We’re looking deeper to uncover those less-apparent risks that often fly under the radar until an incident occurs.
An effective hazard hunt isn't a one-trick pony. It’s a blend of three simple but powerful techniques: walking the site, talking to your team, and digging into your history. Nail all three, and you’ll get a 360-degree view that catches issues one approach alone would almost certainly miss.
Practical Ways to Spot Hazards
There's no substitute for a physical walk-through of the area you’re assessing. Don’t rush it. Move through the space systematically. Remember to look up, down, and all around; it's amazing what you'll find when you're not just looking straight ahead.
And don't just stick to the main walkways. Look into storage areas, maintenance closets, and temporary work zones. That's often where the forgotten risks live.
As you walk, engage with your workers. Ask them open-ended questions about their day-to-day tasks. Forget the yes/no questions and try something like, "What's the most frustrating part of this job?" or "Is there anything you have to rig up or work around to get things done?"
These kinds of questions often expose hidden hazards that a simple visual check will never pick up. Your team on the floor knows the reality of the job better than anyone else.
Finally, loop back to those incident and near-miss reports you gathered earlier. These documents are gold. They’re a direct line to past problems. If someone has already flagged a trip hazard in a particular area, that’s your first stop. Reviewing past events helps you see if previous fixes actually worked or if new issues have crept in.
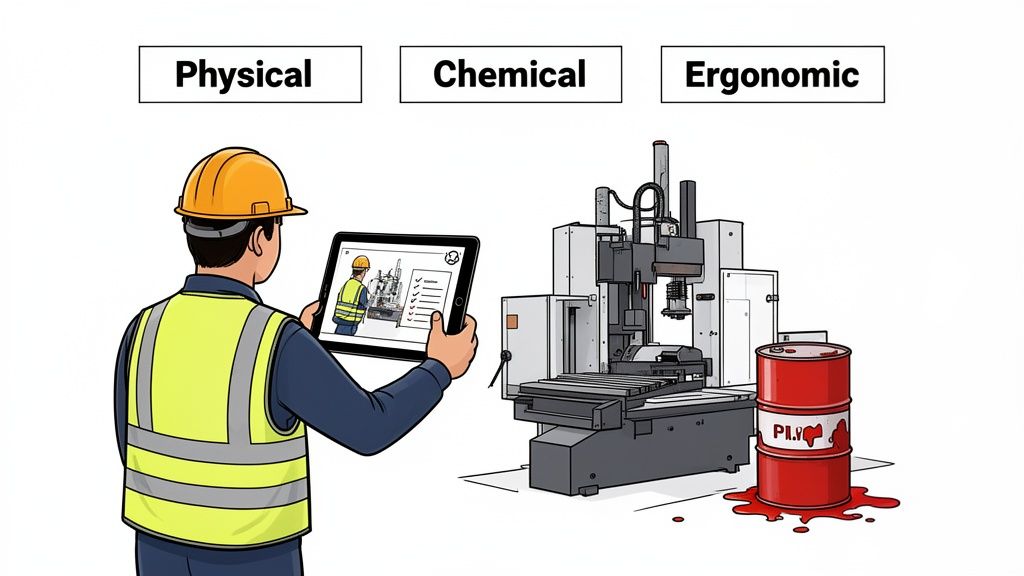
Common Hazard Categories to Look For
To keep your inspection structured, it’s helpful to think in terms of hazard categories. This forces you to look beyond just the obvious physical dangers. Here are the main types you should be focusing on, with a few real-world examples you'll see on Australian construction and manufacturing sites.
Physical Hazards
These are usually the easiest to spot and are responsible for a huge number of injuries in industrial settings. They are tangible things that can cause harm through direct contact.
- Slips, Trips, and Falls: Look for trailing cables from temporary power, uneven ground on a construction site, or small oil spills near machinery in a factory. They seem minor, but they account for a staggering number of workplace injuries.
- Unguarded Machinery: Are all guards in place on presses, saws, conveyors, and rotating parts? A missing guard isn't a potential problem; it's an immediate and serious threat.
- Noise: Is hearing protection required, and more importantly, is it actually being used? Constant high noise levels from machinery cause permanent, irreversible hearing damage.
- Electrical: Check temporary switchboards for correct setup, look for damaged leads, and make sure all equipment has been tested and tagged.
Chemical Hazards
Chemicals can cause harm in multiple ways: inhalation, skin contact, or ingestion. This makes proper storage and handling absolutely critical.
- Incorrect Storage: Watch for unlabelled containers, flammable liquids stored next to ignition sources, or chemicals kept in areas without proper ventilation.
- Missing Safety Data Sheets (SDS): Every single chemical on site must have an accessible SDS. If workers can't find information on a substance in a hurry, they can't handle it safely. Simple as that.
- Inadequate PPE: Are workers using the right gloves, goggles, or respirators? The SDS for each chemical specifies exactly what's required, so check it against what's being used.
Ergonomic Hazards
These hazards are all about the interaction between a person's body and their work environment. They’re sneaky, often leading to strains, sprains, and serious long-term injuries.
- Manual Handling: Watch for workers lifting heavy or awkward items without mechanical aids. Repetitive lifting, even of lighter objects, is a massive risk factor for back injuries.
- Poor Workstation Design: Are people constantly bending over, reaching too high, or twisting their bodies to do their job? A poorly configured workstation on a production line is a recipe for chronic pain.
- Repetitive Tasks: Think about actions performed over and over, like using a power tool for an entire shift. These can lead to serious musculoskeletal disorders like carpal tunnel syndrome.
Below is a quick reference table to help you spot some of the most common hazards in these high-risk industries.
Common Hazards in Construction and Manufacturing
| Hazard Category | Construction Example | Manufacturing Example |
|---|---|---|
| Physical | Unstable scaffolding, falling objects from height, exposed rebar, temporary electrical leads across walkways. | Unguarded moving parts on machinery, forklift traffic in pedestrian areas, high noise levels from presses. |
| Chemical | Silica dust from cutting concrete, fumes from welding, uncapped containers of solvents or fuels. | Vapours from cleaning agents, leaks from hydraulic systems, improper storage of flammable liquids. |
| Ergonomic | Repetitive manual lifting of heavy materials (e.g., bags of cement), awkward postures while tying steel. | Repetitive motions on an assembly line, poorly designed workstations causing bending or reaching. |
| Biological | Exposure to mould in water-damaged areas, risk of encountering snakes or spiders on greenfield sites. | Contaminated water in cooling towers (Legionella), mould growth in poorly ventilated areas. |
| Psychosocial | High-pressure deadlines leading to fatigue, workplace bullying or harassment, lack of worker consultation. | Unrealistic production targets causing stress, shift work disrupting sleep patterns, isolated work tasks. |
This isn't an exhaustive list, of course, but it gives you a solid starting point for what to keep an eye out for during your walk-through.
The most effective way to document hazards is in the moment. Relying on memory and paper notes back at the office leads to inaccurate or incomplete records. Things get forgotten, and crucial details are lost.
Documenting Hazards on the Spot
This is where modern tools completely change the game. Using a digital platform like Safety Space on a tablet or phone means you can log hazards as soon as you find them.
You can snap a photo of the unguarded machine part or the poorly stored chemicals, add a quick note, and assign a priority level, all right there on the spot.
This creates an instant, accurate, and time-stamped record. There’s zero ambiguity about which hazard you’re talking about because the photo provides undeniable visual proof. This simple action builds a reliable, trackable log of risks that can be monitored until they are resolved, creating a clear audit trail for compliance.
For a deeper dive into specific issues, you can learn more about common hazards in the workplace in our detailed guide.
Using a Risk Matrix to Prioritise Your Actions
After you’ve walked the site and put together a list of potential hazards, you’re hit with a big question: where do you start? You can't fix everything at once, and frankly, not all hazards are created equal.
You need a simple, logical way to sort through the noise and figure out which issues need your immediate attention. This is where a risk matrix becomes one of the most practical tools in your kit.
A risk matrix helps you graduate from simply spotting hazards to properly evaluating them. It’s a visual tool that plots the likelihood of something going wrong against the consequence (or severity) if it does. This gives you a clear, consistent method for ranking each risk, making it obvious which ones are the real bombshells.
The goal isn't to get bogged down in complicated maths. It's about applying some structured common sense so you can channel your time, budget, and energy where they'll make the biggest difference.
Breaking Down Likelihood and Consequence
To make the matrix work, you assign a score to each hazard for two key factors, usually on a scale of 1 to 5.
First up, you assess the likelihood. This is your best professional judgement on how probable it is that an incident will actually happen.
- 1 - Rare: Almost never happens and is highly unlikely to occur.
- 2 - Unlikely: You wouldn't expect it to happen, but there’s a slight chance.
- 3 - Possible: It could happen from time to time; you've seen it before or heard of it happening at similar sites.
- 4 - Likely: It will probably happen at some point. These things happen regularly.
- 5 - Almost Certain: You're just waiting for it to happen; it occurs frequently.
Next, you need to evaluate the consequence. If the worst did happen, how bad would the fallout be?
- 1 - Insignificant: A few scrapes, a minor first aid injury. No lost time.
- 2 - Minor: An injury needing medical treatment, maybe a few days off work.
- 3 - Moderate: A serious injury that requires hospitalisation and causes significant lost time.
- 4 - Major: A permanent disability or a life-altering illness.
- 5 - Catastrophic: A fatality.
By multiplying these two scores, you get a single risk rating that screams urgency (or doesn't). For example, a hazard that is Likely (4) to occur and could have Moderate (3) consequences gets a risk score of 12. A different hazard that is Unlikely (2) but could be Catastrophic (5) scores a 10. Now you can compare different types of risks.
Putting the Risk Matrix into Practice
Let's see how this works with a couple of real-world scenarios you’d find on site.
Scenario 1: Construction Site You spot a mobile scaffold that’s missing guardrails on the top level, about four metres up. Workers are using it daily.
- Likelihood: With people working on it every day, an incident is Likely (4).
- Consequence: A fall from that height is going to be devastating: life-changing injuries or death. The consequence is Catastrophic (5).
- Risk Score: 4 x 5 = 20. This is an extreme risk. You stop the job and fix it immediately.
Scenario 2: Manufacturing Floor You notice a small hydraulic leak from a press, creating a slick spot on the concrete floor right in the middle of a busy walkway.
- Likelihood: Dozens of people walk through here every shift. A slip is Almost Certain (5) to happen eventually.
- Consequence: Someone slipping could easily end up with a sprain or a broken wrist, requiring medical treatment and time off. The consequence is Minor (2).
- Risk Score: 5 x 2 = 10. While not as immediately life-threatening as the scaffold, this is still a significant risk that needs prompt attention before someone gets hurt.
By plotting these scores on a 5x5 grid, you literally create a visual map of your risks. Anything landing in the red zone (high scores) becomes a top priority. Yellow zone items need a solid plan, and green zone items can be monitored.
This simple method cuts through the confusion and gives you a clear, defensible action plan based on genuine risk. To dig deeper into this tool, check out our detailed guide on the risk management matrix and how to apply it in different situations.
Using Digital Tools for Faster, Consistent Scoring
Manually calculating scores for dozens of hazards is a drag. It’s tedious and opens the door to inconsistencies, especially when you have different teams or sites trying to follow the same process.
A digital platform takes this chore off your hands entirely.
Instead of fumbling with a spreadsheet, your team just selects the likelihood and consequence from a simple dropdown menu. The system instantly calculates the risk rating and colour-codes it for you. This standardises the entire risk assessment at your workplace, ensuring everyone is speaking the same language and creating a clear, trackable record of every risk from the moment it’s found to the moment it’s fixed.
Implementing Controls and Keeping Good Records
Spotting a hazard is just the beginning. The real work and the real safety gains happen when you decide what to do about it. A risk assessment that doesn't lead to clear actions is just a piece of paper, but one with a solid action plan creates a safer worksite and a solid trail for compliance.
Putting effective controls in place isn't about finding the quickest or cheapest fix; it's about finding the most reliable one. That's where the Hierarchy of Controls comes in. It’s a dead-simple, practical framework that forces you to start with the most effective solutions, rather than just jumping straight to giving someone a pair of gloves.
This simple process shows how you move from spotting a hazard, figuring out its potential harm, and then getting your priorities straight for taking action.
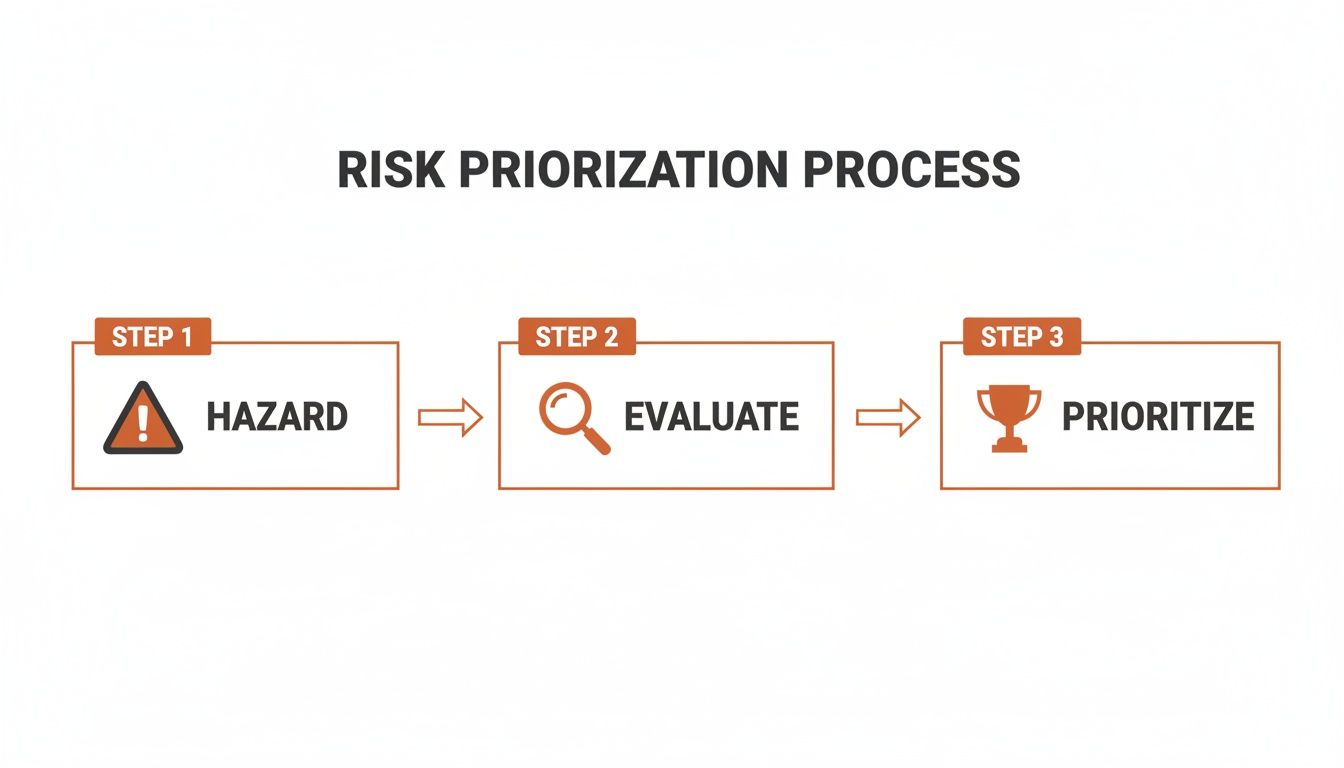
As the graphic shows, after you’ve identified a hazard, you need to properly evaluate it. This is crucial for correctly prioritising which risks need your immediate attention, making sure your resources are directed where they’ll have the biggest impact.
Applying the Hierarchy of Controls
Think of this hierarchy as your problem-solving cheat sheet. Always start at the top and work your way down. You should only move to a lower-level control if the ones above it aren't reasonably practical.
Elimination: The best-case scenario. Can you get rid of the hazard completely? On a construction site, this might mean pre-fabricating components on the ground to remove the need for working at height. In a manufacturing setting, it could be designing a new process that avoids using a toxic chemical in the first place.
Substitution: If you can't eliminate it, can you swap it for something safer? This is all about replacing a hazardous process, material, or piece of equipment. Think about using a water-based paint instead of a solvent-based one, or switching to a cordless drill to get rid of a long, trailing lead that’s a trip hazard.
Engineering Controls: These are physical changes you make to the workplace that isolate people from the hazard. We're talking about things like installing guard rails around a mezzanine, building sound-proof enclosures for noisy machinery, or fitting a local exhaust ventilation system to capture welding fumes right at the source.
Administrative Controls: This is about changing how people work. It includes things like developing Safe Work Procedures, providing training, putting up warning signs, or scheduling jobs to limit how many workers are exposed to a hazard at one time. A classic example is implementing a clear traffic management plan for forklifts and pedestrians on the factory floor.
Personal Protective Equipment (PPE): This should always be your last line of defence, not your first thought. Hard hats, gloves, and safety glasses only protect the person wearing them, and they rely on being used correctly every single time. PPE should only be used when the higher-level controls can't get the risk down to an acceptable level on their own.
A common mistake I see all the time is people jumping straight to PPE because it feels like an easy fix. But a sign and a hard hat are no substitute for properly dealing with a genuine overhead risk. Always challenge yourself to solve the problem with a higher-level control first.
What Your Records Must Include
Good documentation isn't about bureaucracy; it’s your legal proof that you're managing safety properly. Under Australian WHS laws, your records for a risk assessment at your workplace have to show not just what you found, but what you actually did about it.
Your notes need to be specific. Vague comments like "fix leaking pipe" won't cut it. Your records must detail exactly what needs to happen.
A complete action record should include:
- The Control Measure: A specific description of the action (e.g., "Install a permanent guard rail on the north side of the assembly line platform").
- Person Responsible: The name or role of the person accountable for getting it done (e.g., "Maintenance Supervisor").
- Due Date: A realistic deadline for when the control needs to be in place.
- Completion Date: The actual date the work was finished.
- Verification: A quick note confirming the control was checked and is working as intended.
This level of detail creates a clear line of accountability. It shows regulators you have a systematic process for managing risk right through from identification to resolution.
This is another spot where a digital system makes a huge difference. With a platform like Safety Space, you can assign actions directly to team members, set deadlines, and get automatic follow-ups. When the job’s done, they can mark it as complete and even upload a photo as proof. This automatically builds a perfect, auditable trail for every single risk you manage, all kept securely in one place.
Keeping Your Assessments Alive and Compliant
Getting a risk assessment done and dusted feels like a big win, but it’s really just the starting line. A worksite is a living, breathing thing; it changes every day, and your assessment needs to keep pace. Treating it as a "set and forget" document is one of the biggest mistakes you can make. It's not a trophy to hang on the wall; it's a live document that needs constant attention to be effective.
An assessment that's gathering dust offers a false sense of security. Worse, it won't hold up if a regulator comes knocking. The real skill is knowing exactly when to pull it out and give it a hard look. Waiting for an incident to force your hand is always too late. Staying ahead of the game with proactive reviews is what keeps people safe and the business running without a hitch.
When Should You Review Your Risk Assessment?
Certain events should be non-negotiable triggers for a review. These are the moments when you have to stop, take a breath, and re-evaluate what you thought you knew.
Your trigger list should absolutely include:
- After any incident or near miss: This one’s a no-brainer. If something went wrong, or nearly went wrong, there's a gap in your assessment or a control that just didn't work as planned.
- When you bring in new machinery or equipment: A new piece of kit always introduces new ways for things to go wrong. It needs a thorough risk assessment before it becomes part of the daily grind.
- If a work process or procedure changes: Even a small tweak to how a job gets done can create a ripple effect of new, unforeseen risks.
- When new laws or standards are introduced: Australian WHS legislation doesn't stand still, and neither can your safety practices. You have to move with the times to stay compliant.
- After getting feedback from your crew: If your team on the ground raises a concern, listen. They’re your best source of real-world intel, and their feedback is a clear sign that something needs a second look.
It’s not enough to just do the review; you have to prove you did it. In jurisdictions like Western Australia and South Australia, regulators will want to see more than just your current assessment; they'll ask for a clear history of your reviews and updates. This shows you have an active, ongoing commitment to safety, not just a box-ticking exercise.
This is where a digital system makes life so much easier. A platform like Safety Space doesn't just store your current assessment; it keeps a full history locked away securely, creating an instant audit trail. It can also send out automated reminders for your next scheduled review, so nothing slips through the cracks and you're not left scrambling through a mountain of old paperwork.
Common Questions Answered
We get a lot of questions about the practical side of running a risk assessment. Below are some straight answers to the queries that land in our inbox most often from managers in construction and manufacturing.
How Often Should I Conduct a Risk Assessment?
There's no single, magical timeframe dictated by law, like "every 12 months on the dot." What Australian WHS laws do require is that you review and keep your assessments current. A full, formal review at least once a year is a solid rule of thumb.
But here’s the most important part: you absolutely must conduct a review immediately if something changes. This could be bringing in new machinery, altering a work process, or after any incident or even a near miss. An outdated risk assessment at your workplace isn't just bad practice; it's a serious compliance risk waiting to happen.
Who Is Legally Responsible for the Risk Assessment?
The buck ultimately stops with the Person Conducting a Business or Undertaking (PCBU), which is usually the company itself. This is a primary duty of care, and you can't just pass it off completely.
In day-to-day operations, the task is usually delegated to a competent person, like a dedicated Health and Safety Manager or a site supervisor. The critical thing to remember is that WHS laws mandate that you must consult with your workers during the process. Their direct input isn't just a nice-to-have; it's a non-negotiable legal requirement.
What Is the Difference Between a Hazard and a Risk?
It's a simple distinction, but a crucial one that often trips people up.
A hazard is anything with the potential to cause harm. Think of an unguarded machine, a container of chemicals, or a noisy generator. It's the thing itself.
A risk is the likelihood of that hazard actually causing harm, combined with how severe that harm could be.
So, the unguarded machine (the hazard) presents a high risk of a catastrophic injury. Simple as that.
Ready to manage your workplace risk assessments with a system built for action, not just paperwork? Safety Space replaces messy spreadsheets and forgotten forms with a simple, all-in-one platform. Get a clear view of your compliance, assign actions, and create a solid safety record. See how it works by booking a free demo.
Ready to Transform Your Safety Management?
Discover how Safety Space can help you implement the strategies discussed in this article.
Explore Safety Space FeaturesRelated Topics
Safety Space Features
Explore all the AI-powered features that make Safety Space the complete workplace safety solution.
Articles & Resources
Explore our complete collection of workplace safety articles, tools, and resources.