
A risk assessment process is a structured way of spotting workplace hazards, figuring out the risks they pose, and then doing something about it to prevent anyone from getting hurt. It’s meant to be a practical tool for the worksite, not just another piece of paperwork to file away.
What a Risk Assessment Process Really Involves
Let’s cut through the jargon. At its core, a risk assessment process is about making smart, informed decisions to keep people safe on construction sites and in manufacturing plants. This isn't about pointing fingers after an incident; it's about proactively asking "what could go wrong here?" and putting sensible measures in place before it does.
This structured approach takes safety from guesswork to a logical, repeatable system. A good process makes sure you’re focusing your time, money, and effort on the biggest threats first. It also gives you a clear, defensible record of the decisions you made to protect your team.
This simple diagram breaks down the core cycle: find the hazard, analyse the risk, and control it.
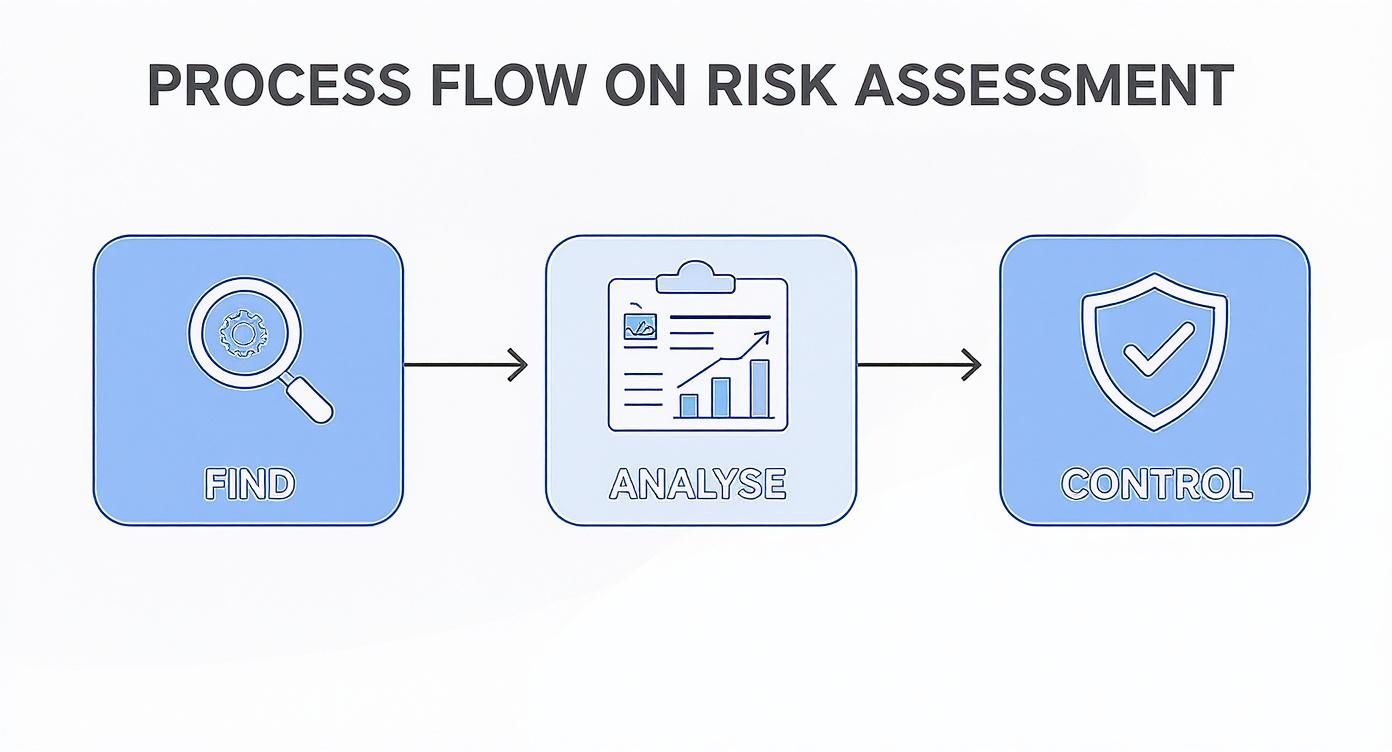
The key thing to notice is that it’s a continuous loop. Safety isn't a "set and forget" task; it's an ongoing cycle of checking, learning, and improving.
The Key Stages of a Practical Risk Assessment Process
Every solid risk assessment process, no matter the industry, follows a few key stages. Each one builds on the last, creating a clear path from identifying a problem to solving it effectively.
Here’s a quick rundown of what that looks like in practice.
| Stage | What It Means | Simple Goal |
|---|---|---|
| Hazard Identification | Actively looking for things that could cause harm. | Find what could hurt someone. |
| Risk Analysis | Figuring out how likely a hazard is to cause harm and how bad it could be. | Prioritise the biggest dangers. |
| Control Implementation | Choosing and applying the best actions to get rid of the hazard or reduce the risk. | Fix the problem. |
| Monitoring & Review | Regularly checking that your controls are working and updating the assessment as things change. | Make sure the fix actually works. |
These stages form the backbone of any effective safety management plan, turning good intentions into real-world protection.
Breaking Down the Four Core Components
Let's look a little closer at those four stages.
Hazard Identification: This is where you get your boots on the ground. It involves walking through the site, inspecting equipment, reviewing incident reports, and most importantly, talking to the people who do the work every day. They often know the hidden dangers better than anyone.
Risk Analysis and Evaluation: Once you’ve spotted a hazard, you need to weigh it up. How likely is someone to get hurt, and how severe would the injury be? This step is crucial for prioritising. A wobbly handrail is a problem, but an unguarded machine with exposed moving parts is a crisis that needs immediate attention.
Control Implementation: This is the action phase. Based on your analysis, you implement controls to either eliminate the hazard completely or reduce the risk to an acceptable level. We’ll cover the Hierarchy of Controls in detail later, but the goal is always to find the most effective, reliable solution possible.
Review and Monitoring: The job isn't done once a control is in place. You have to circle back. Are the new guard rails being used correctly? Did the updated procedure actually make the task safer? This final step involves regular checks and updates, especially when new equipment, people, or processes are introduced.
A common mistake is treating the risk assessment as complete after the paperwork is filed. The real value comes from the ongoing review and confirmation that your control measures are effective in the real world.
There are many ways to approach these steps. To get a better feel for the different techniques you can use in your own process, it's worth exploring some detailed insights on various risk assessment methods. This is also why government bodies conduct their own assessments, like the Comcover Risk Management Benchmarking survey, which helps Commonwealth entities measure and improve their risk management capability.
Setting Up Your Risk Assessment Framework
Before you can even think about identifying hazards on site, you need a solid plan of attack. A good framework is what separates a consistent, organised, and effective risk assessment process from a mad scramble every time something goes wrong. It’s the foundation that turns a tick-box compliance task into a practical tool that actually keeps your people safe.
Think of it like the blueprint for a build. Without one, everyone does their own thing, pieces don't fit, and the final structure is shaky at best. A framework ensures everyone is working from the same plans, using the same methods to hit the same goal.
Define the Scope of Your Assessment
First things first, you need to decide exactly what you’re looking at. Trying to assess an entire manufacturing plant or a huge construction site in one go is a recipe for disaster. It’s just too broad, and you’re guaranteed to miss critical details.
Instead, break it down into manageable chunks. Your scope could cover:
- A specific area: Like the fabrication workshop or the level three scaffold.
- A particular task: Such as operating the press brake, installing roof trusses, or carrying out hot work.
- A piece of equipment: Focusing on the risks tied to a specific forklift model or a concrete cutting saw.
Defining a tight scope keeps the assessment focused and makes sure you get a detailed, useful outcome. You can always run multiple assessments to cover the whole site, but each one needs its own clear boundaries to be effective.
Clarify Roles and Responsibilities
A risk assessment process will fall apart without clear ownership. You have to decide who’s involved and what their exact role is. This isn’t just about assigning tasks; it’s about accountability.
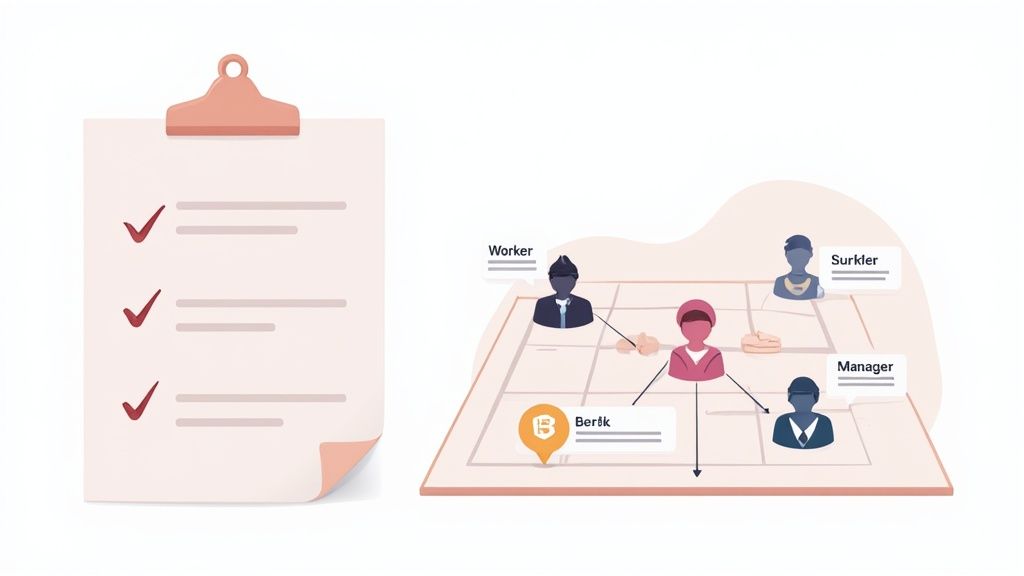
So, who needs to be at the table?
- Frontline Workers: The operators and tradies doing the work every day. Their input is non-negotiable, they have firsthand knowledge of the real-world hazards no one else does.
- Supervisors and Foremen: They’re the ones overseeing the work and are often responsible for implementing controls on the ground.
- Health and Safety Representatives (HSRs): They are the elected voice for workers on safety matters and a crucial link in the chain.
- Site or Plant Managers: They hold the ultimate responsibility and need to sign off on the resources needed for control measures.
- Subcontractors: If they’re on your site, they must be part of the process for the work they perform. Managing shared risks is impossible without their direct involvement.
A classic mistake is doing assessments in an office, miles away from the actual work. Getting the right people involved directly at the worksite is the only way to get a true picture of the risks.
Once the roles are sorted, get it down in writing. A simple table outlining who is responsible for initiating, conducting, reviewing, and approving assessments can head off a lot of confusion and make sure nothing gets missed.
Understand Your Legal Obligations
In Australia, your actions are guided by Work Health and Safety (WHS) laws. These aren’t just friendly suggestions; they are hard-and-fast legal requirements. Your framework must line up with the WHS Act and the relevant Regulations and Codes of Practice in your state or territory.
This means your process has to systematically identify hazards, assess risks, implement controls that are "reasonably practicable," and review them regularly. It's not about producing a document to file away; it's about demonstrating a genuine, active process.
You don't need to be a lawyer, but you do need to understand your core duties to consult with workers and manage risks. To see how these principles fit into a global standard, you can learn more about the ISO 31000 risk management framework.
Create a Usable Template
Consistency is everything. A standardised template ensures every risk assessment captures the same critical information, no matter who’s filling it out. This makes it far easier to compare risks across different jobs or areas and to track your progress over time.
Your template shouldn't be a ten-page document that nobody wants to touch. Keep it simple and practical.
At a minimum, it should include fields for:
- Assessment details (date, location, assessor)
- A clear description of the task or area being assessed
- A list of identified hazards
- Risk analysis (using your chosen risk matrix)
- Proposed control measures
- The person responsible for implementing each control
- A due date for implementation
- A sign-off section for review and approval
By setting up this simple but solid framework, you’re preparing your team to conduct effective and consistent risk assessments. This structure provides the clarity and direction needed to move from planning to action.
This is where the boots hit the ground. A solid risk assessment process lives or dies on your ability to spot real-world hazards before they cause harm. It’s not about finding fault; it’s about having a curious, critical eye and actually listening to the people exposed to the risks every single day.
Simply walking around with a clipboard isn’t going to cut it. You need a mix of techniques to uncover not just the obvious problems, but the hidden ones that only surface under certain conditions. Combining a few different methods gives you a much clearer picture of what’s really happening on site.

Practical Methods for Finding Hazards
A thorough hazard hunt pulls from multiple sources of information. Relying on just one method means you will miss things. The goal here is to build a complete list by looking at the workplace from a few different angles.
1. Conduct Physical Walkthroughs
This is the most direct method. Walk the site with the specific intention of looking for things that could hurt someone. Don't just stroll through, stop, look up and down, and observe tasks as they happen.
- Construction Example: On a busy building site, this means looking for unsupported excavation edges, trailing electrical leads across walkways, or poorly stacked materials that could topple over.
- Manufacturing Example: In a factory, you might spot a coolant spill on the floor near a walkway, a missing guard on a rotating machine, or blocked access to a fire extinguisher.
2. Talk to Your Workers
Your team on the tools is your single best source of information. They know the shortcuts people take, the machine that’s started making a funny noise, and the "near misses" that never get reported.
Ask open questions like, "What's the riskiest part of your job?" or "Is there anything here that you constantly have to work around?" Their insights are valuable because they experience the risks firsthand.
3. Review Past Incident Reports
Your own history is a powerful teacher. Dig into your incident, injury, and near-miss reports and look for patterns. Are there recurring issues in a specific area or during a particular task? This data points you directly to proven problem areas that need attention.
For a deeper dive, you can learn more about identifying different types of hazards in the workplace to get a better sense of what to look for. This helps you categorise and understand the problems you find.
From a Long List to a Prioritised Plan
Once you have a list of hazards, the next job is to figure out which ones pose the biggest threat. Not all risks are created equal. A frayed power cord is a problem, but an unguarded chemical vat is a potential catastrophe. You need a simple system to sort the urgent from the important.
This is where a risk matrix comes in. It’s a straightforward tool for scoring risks based on two simple factors:
- Likelihood: How likely is it that someone will be harmed by this hazard?
- Consequence: If they are harmed, how severe would the injury be?
By plotting these two factors on a grid, you can quickly assign a risk score to each hazard. This transforms your long, messy list into an organised, prioritised action plan.
A risk matrix isn't about generating a perfect, scientific number. Its purpose is to create a consistent framework for decision-making, ensuring everyone on the team evaluates risks the same way and focuses on the most serious problems first.
This scoring system gives you a defensible reason for where to spend your time and resources. A "High" or "Extreme" risk rating demands immediate action, while a "Low" risk might be addressed through routine maintenance.
Using a Simple Risk Matrix
Here is a practical risk matrix you can adapt for your workplace. Take each hazard you’ve identified and ask the two key questions.
First, determine the most credible consequence. Could it result in a minor cut (Insignificant) or a fatality (Catastrophic)? Then, decide the likelihood of that consequence happening. Is it almost certain to occur at some point, or is it highly unlikely (Rare)? The box where your two answers meet gives you the risk rating.
Simple Risk Matrix Example
| Likelihood | Insignificant Consequence | Minor Consequence | Moderate Consequence | Major Consequence | Catastrophic Consequence |
|---|---|---|---|---|---|
| Almost Certain | Medium | High | High | Extreme | Extreme |
| Likely | Medium | Medium | High | High | Extreme |
| Possible | Low | Medium | Medium | High | High |
| Unlikely | Low | Low | Medium | Medium | High |
| Rare | Low | Low | Low | Medium | Medium |
This table immediately shows you where your priorities lie. Anything falling into the Extreme or High categories requires your immediate attention and the most robust controls. This structured evaluation is the critical link between just finding a problem and actually fixing it.
Choosing and Implementing Practical Controls
Once you've identified your hazards and scored the risks, it's time to do something about them. This is where the whole process moves from just analysis to real, tangible action. The goal isn't just to find any solution, but to find the most effective, reliable, and practical one for your specific situation.
This is where the Hierarchy of Controls comes in. Think of it as a problem-solving framework that forces you to prioritise the best solutions first. It’s designed to guide you away from the easy fixes, like just handing out more PPE, and push you toward finding better, more permanent ways to make the job safer.
The Hierarchy of Controls Explained
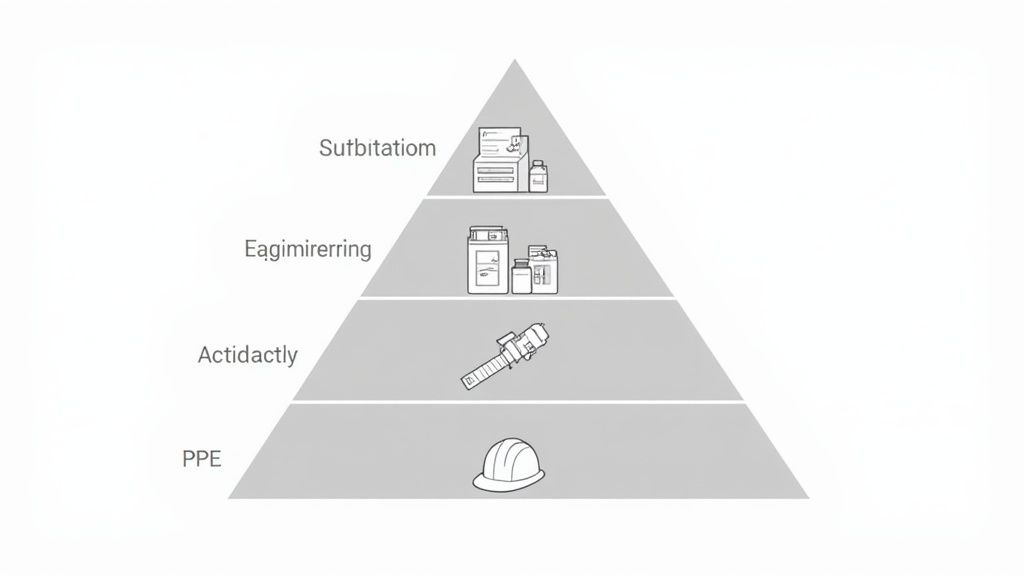
The hierarchy is a simple pyramid, with the most effective controls at the top and the least effective at the bottom. The rule is to always start at the top and work your way down until you land on a control that is reasonably practicable to implement.
Here’s how it breaks down:
Elimination: This is the gold standard, completely removing the hazard. For example, instead of having workers assemble a component up on scaffolding, you could prefabricate it on the ground and lift the finished piece into place. Just like that, the risk of falling from height for that specific task is gone.
Substitution: If you can't get rid of the hazard entirely, can you swap it for something less dangerous? A classic example is switching from a toxic, solvent-based paint to a water-based alternative. The job still gets done, but the chemical hazard is massively reduced.
Engineering Controls: These are all about making physical changes to the workplace or equipment. Think guard rails around an open edge, machine guarding to keep hands away from moving parts, or a local exhaust system to capture welding fumes right at the source.
Administrative Controls: This level involves changing the way people work. It includes things like developing safe work procedures (SWMS), providing targeted training, using clear warning signs, or implementing job rotation to limit a worker's exposure to repetitive strain.
Personal Protective Equipment (PPE): This is your last line of defence. PPE, like hard hats, gloves, or safety glasses, does nothing to remove the hazard itself. It simply puts a barrier between the worker and the harm, and it only works if it’s worn and used correctly, 100% of the time.
A common pitfall is jumping straight to PPE because it seems like the quickest and cheapest fix. The most effective risk management processes always challenge the team to find a solution higher up the hierarchy first.
From Control to Action Plan
Choosing a control is only half the battle. An idea is useless if it never gets put into practice. That’s why every single risk assessment needs to end with a dead-simple action plan.
A good action plan leaves no room for confusion. It has to clearly state:
- What specific action needs to be taken.
- Who is responsible for making it happen.
- When it needs to be completed.
For instance, instead of a vague note like "Install guard rail," a proper action item would be: "John Smith (Site Foreman) to install compliant guard railing around the Level 2 perimeter by Friday, 24 May." This creates direct accountability and a clear deadline.
This kind of structured follow-up is what turns a risk assessment from a paperwork exercise into real safety improvements on the ground.
A Practical Example on a Construction Site
Let's walk through a common construction scenario: an open excavation for a new building's foundation.
- Hazard: The collapse of the trench walls.
- Risk: Workers being buried, leading to catastrophic injury or death. On any risk matrix, this is an Extreme risk.
Now, let's apply the hierarchy to find the best control:
- Elimination: Could we redesign the foundation to avoid deep excavation altogether? Unlikely in this case. We have to move on.
- Substitution: Doesn't really apply here.
- Engineering Controls: This is where we'll find the most effective solution. We could bench or batter the excavation walls to a safe angle, or better yet, install a physical support system. In unstable ground, knowing and using proper excavation shoring techniques is a non-negotiable engineering control that prevents collapses.
- Administrative Controls: We’d also restrict access to the area, put up clear warning signs, and train workers to recognise early signs of ground instability.
- PPE: Hard hats are a must, but they offer zero protection if a trench wall gives way.
Your action plan would then assign the task of sourcing and installing the shoring system to a specific supervisor with a hard deadline, ensuring this critical engineering control is in place long before anyone sets foot in that trench.
Keeping Your Risk Assessments Alive: Monitoring and Review
Finishing a risk assessment isn't the end of the job; it's just the beginning. A risk assessment process is only worth the paper it’s written on if you actively check that your controls are actually working in the real world. This is what turns a static document into a live tool that adapts as your worksite changes.
This follow-up stage is all about answering one simple question: "Did the fix actually work?"
It's amazing how often controls that look great on paper fail in practice. Maybe that new guard gets taken off because it slows the job down, or a new procedure is ignored because it’s just too complicated. The only way you’ll ever know is to get back out on the floor and check for yourself.
When to Review Your Risk Assessments
A review can't be a random event. Your process needs clear triggers that tell you it's time for a fresh look at your existing assessments. Let's be clear: waiting for something to go wrong is not a strategy.
You should be ready to review your assessments whenever:
- An incident or near-miss happens: This is the most obvious red flag. It’s a clear signal that your current controls have failed.
- New gear shows up: A new press, vehicle, or even a different brand of power tool brings new, unassessed risks with it.
- The way you work changes: Modifying how a job gets done can create completely new hazards or make your old controls useless.
- New information comes to light: This could be a safety alert from a manufacturer, new guidance from a regulator, or an update to an Australian Standard.
- Your team flags an issue: Your workers are on the front line. If they raise a problem that wasn't obvious during the initial assessment, listen to them.
Beyond these triggers, you need a regular schedule. It’s best practice to set a calendar reminder to review all high-risk assessments at least once a year. For lower-risk ones, every two to three years is usually enough to catch any gradual changes.
Practical Ways to Monitor Your Controls
Monitoring is the hands-on bit. It’s where you gather real-world evidence to prove your controls are doing what you expect them to.
This is more than just a quick glance around the site. You need to be:
- Walking the site specifically for this: Do an inspection with the sole purpose of checking controls. Are machine guards fitted and in use? Is that exclusion zone around the crane actually being respected?
- Talking to your workers: Just ask them. Is the new ventilation system making a real difference? Is the updated safe work procedure practical to follow, or is it a pain?
- Digging into your records: Check your maintenance logs, incident reports, and inspection checklists. Look for patterns or recurring issues that might show a control is failing.
This continuous loop of checking, adjusting, and checking again is what keeps people safe. It's the same logic applied to massive national projects. For instance, Australia’s National Climate Risk Assessment identified key risks by looking at what was already being done and where the gaps were. You can learn more about how national risk assessments enable targeted interventions on grantthornton.com.au.
Documenting and Updating Your Findings
Every single review needs to be documented. If you find a control isn't working, your original risk assessment has to be updated, not next week, but right away.
Your update should record what you found during the review and clearly outline the new, improved controls. This creates a clear paper trail, showing how your understanding of the risk and your approach to managing it has evolved over time. This documentation is not just for compliance; it's how you learn from experience and make your entire safety process stronger.
Using Digital Tools for Your Risk Assessments
Let's be honest, stacks of paper and clunky spreadsheets aren't just inefficient, they're holding your safety performance back. Moving your risk assessment process into a digital environment makes it faster, clearer, and a whole lot more effective. It’s not just about storing information; it's about actively managing risk by connecting every step in one place.
This shift means you can finally stop chasing lost forms or wondering if the controls from three weeks ago were ever actually put in place. Instead, you get a live, accurate picture of what's happening across all your sites, right now.
Get Consistent and Complete Information
One of the biggest wins you’ll see right away is consistency. With custom digital forms, you can ensure every single risk assessment captures the same essential information, every time. You can make key fields mandatory, so critical steps like assigning a risk score or detailing a control measure simply can't be skipped.
This kind of standardisation is a game-changer when you're managing multiple sites or overseeing subcontractors. It forces everyone, from your direct employees to external teams, to follow the exact same process. That gives you data you can actually compare and trust.
Moving to digital forms is less about fancy technology and more about reliability. It guarantees the core parts of your risk assessment process are always followed, removing guesswork and stopping incomplete assessments from slipping through the cracks.
See Risks and Controls in Real Time
Paper-based systems are painfully slow. A critical risk identified on-site might not land on a manager's desk until the end of the day, or even later. Digital platforms completely flip this on its head by offering real-time monitoring.
When a worker completes a risk assessment on a tablet or phone, that information is available instantly. Managers can see new high-risk hazards as they pop up and track the progress of control measures from their office or even their vehicle. This immediate visibility allows for much quicker intervention and far better oversight, ensuring urgent problems are tackled without delay. When you're looking for a solution, it's smart to find a platform that includes strong risk control software to properly close the loop between identifying a hazard and getting it fixed.
Make Assessments Smarter and Faster
Modern tools also bring intelligent features to the table that save time and seriously improve the quality of your assessments. AI-assisted completion is a perfect example of this in action.
Instead of starting from a blank slate every time, the system can give workers a helping hand by:
- Suggesting common hazards based on the specific task they’re performing, like "working at height" or "operating an angle grinder."
- Pre-filling information like the site location or equipment details, which cuts down on repetitive, manual data entry.
These features help your team complete assessments more quickly and, more importantly, more thoroughly. By prompting them with potential hazards they might have otherwise missed, it reduces the chance that something important gets overlooked.
Common Questions Answered
Let's tackle a few of the questions that always come up when we're talking about risk assessments in Australia.
How Often Should I Do a Risk Assessment?
A risk assessment isn't a "set and forget" document. Think of it as a living thing that needs attention. You have to review it regularly, but just as importantly, you need to pull it out whenever something significant changes on your worksite.
What triggers a review?
- Bringing in a new piece of equipment or a new chemical.
- After an incident or even just a near-miss. These are golden opportunities to learn.
- If you change the layout of the workplace.
- As part of your standard scheduled review, whether that's annually or every two years.
And for those really high-risk jobs, think confined space entry or working at heights, it's just good practice to review the assessment before every single start. Every time.
Who Should Be Involved in the Process?
The best risk assessments are always a team effort. You absolutely have to involve the people who are actually doing the work day in, day out.
Your frontline workers have a gut-level, practical understanding of the hazards that a manager or safety advisor might completely miss from the comfort of an office.
A solid team usually includes:
- The workers actually performing the task.
- Their direct supervisor or foreman.
- A Health and Safety Representative (HSR), if you have one on site.
When you get this mix of hands-on experience and supervisory oversight, you end up with a risk assessment process that is both practical and properly managed.
One of the most common mistakes I see is one person sitting in an office, ticking boxes and filling out all the risk assessments for a site. This approach is doomed to fail. It misses crucial, real-world input and rarely identifies the problems your crew deals with every single day. Collaboration is everything.
What’s the Difference Between a Hazard and a Risk?
This one trips people up all the time, but the difference is actually pretty simple once you get it.
A hazard is anything with the potential to cause harm. It’s the thing itself. Think of an unguarded blade on a saw, a trailing electrical lead snaking across a walkway, or a drum of a harsh chemical.
A risk is the chance (high or low) that somebody could actually be harmed by that hazard, combined with how severe that harm could be.
So, the unguarded blade is the hazard. The risk is the high likelihood of a worker suffering a severe amputation if they make contact with it. The whole point of the risk assessment process is to find the hazards so you can control the risks they create.
Managing your risk assessment process shouldn't be a nightmare of paperwork and spreadsheets. Safety Space replaces that administrative headache with a simple, all-in-one digital platform. You get real-time visibility across all your sites, ensure everyone is following the same process, and just make safety management easier for the whole team. See how it works at https://safetyspace.co.
Ready to Transform Your Safety Management?
Discover how Safety Space can help you build a safer, more compliant workplace with our comprehensive safety management platform.
Book a Free DemoRelated Topics
Safety Space Features
Explore all the AI-powered features that make Safety Space the complete workplace safety solution.
Articles & Resources
Explore our complete collection of workplace safety articles, tools, and resources.