
A safe work procedures (SWP) template is a reusable guide that breaks down how to perform a task safely. It’s your playbook for identifying potential hazards and spelling out the exact control measures needed to manage them, creating consistency and compliance across your worksite.
Think of it as a practical safety recipe for any job on site.
Why a Template Is a Non-Negotiable Tool
Let's get straight to it. A safe work procedures template isn’t just about ticking boxes; it's a fundamental part of your legal and practical risk management. In high-risk industries like manufacturing and construction, skipping a single step can lead to a serious incident. The whole point of a solid template is to standardise safety, making sure every worker follows the same tested and approved process. Every single time.
This standardisation isn't just good practice, it's a legal expectation. Australian Work Health and Safety (WHS) laws place a clear duty of care on employers to provide and maintain a safe work environment. A well-implemented SWP is a direct way to demonstrate you're meeting this obligation. It turns safety from a vague concept into a clear, instruction sheet for specific tasks.
Meeting Your Legal Obligations
Recent shifts in workplace safety legislation across Australia have increased the pressure on companies to prove they are actively managing risks. With worker fatalities still a reality, authorities are handing down much stricter penalties, including massive fines and potential jail time for directors.
In one recent year alone, 168 Australian workers died on the job, a confronting figure that continues to drive legislative reform. Using a comprehensive safe work procedures template is a key way to show due diligence and prove you're taking your WHS duties seriously.
This decision tree shows how using an SWP template leads to better safety outcomes and compliance, regardless of your incident history.
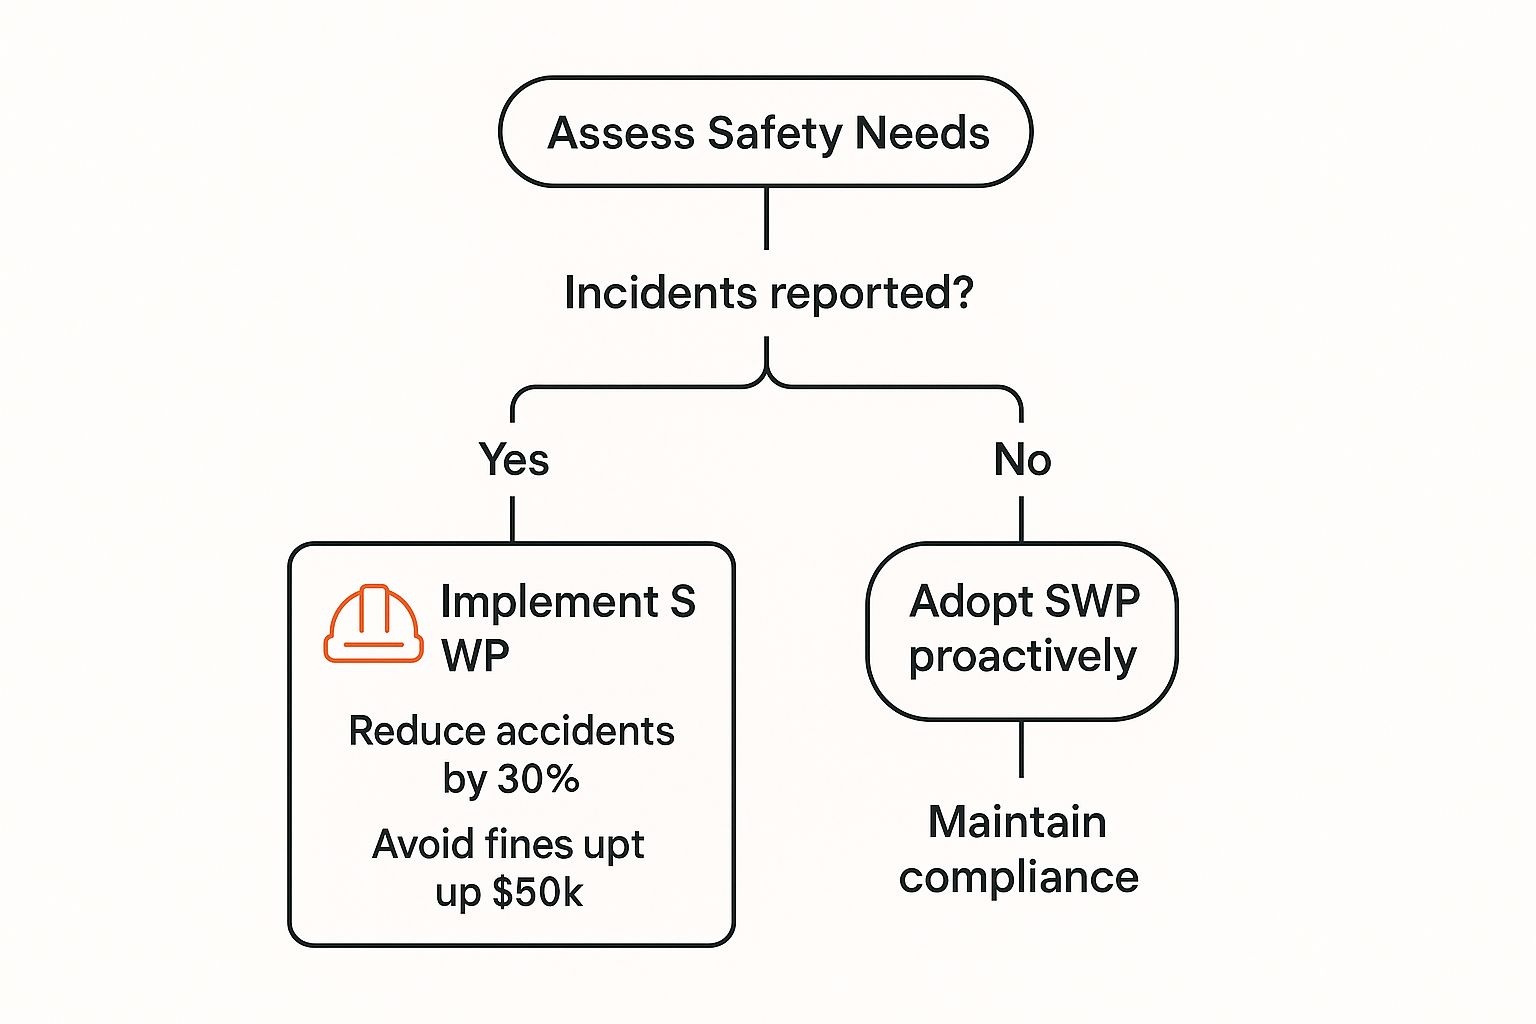
Whether you’re reacting to past incidents or proactively trying to prevent them, implementing SWPs is a direct path to reducing risk and maintaining legal compliance.
A quick-reference table like this one can help break down the essential fields every good Safe Work Procedures template must have.
Key Parts of an Effective SWP Template
| Component | What It Covers | Why It Matters |
|---|---|---|
| Task Description | A clear, concise overview of the job being performed. | Sets the scope and ensures everyone understands what the procedure is for. |
| Hazard Identification | Lists all potential hazards associated with the task (e.g., crush points, electrical shock, falls). | The foundation of the entire procedure. You can't control risks you haven't identified. |
| Risk Assessment | The likelihood and consequence of each hazard causing harm. | Helps prioritise which hazards need the most robust controls. |
| Control Measures | Specific steps, PPE, and equipment needed to eliminate or minimise risks. | This is the "how-to" part. It tells workers exactly what to do to stay safe. |
| Required PPE | A checklist of all personal protective equipment required (e.g., hard hat, safety glasses, gloves). | Leaves no room for guessing and ensures workers are properly protected. |
| Emergency Procedures | Steps to take if something goes wrong (e.g., shutdown sequence, first aid, emergency contacts). | Critical for ensuring a fast and effective response in an emergency. |
| Responsibilities | Defines who is responsible for each part of the procedure (e.g., worker, supervisor). | Creates accountability and clarifies roles on the job. |
| Review & Sign-off | Space for workers and supervisors to acknowledge they have read and understood the SWP. | Documents that the procedure has been communicated and understood by the team. |
Ultimately, having a structured template ensures you don't miss any of these critical components when you're putting a procedure together.
From Paperwork to Practical Protection
One of the biggest mistakes companies make is treating SWPs as documents to be signed and filed away. Their real value is on the workshop floor or construction site.
Take a procedure for operating a metal press. It should detail everything from pre-start checks and correct material feeding techniques to the emergency stop protocols. Without this documented guide, two operators might tackle the task differently, with one unknowingly using a riskier method.
A good SWP template translates your risk assessment into clear, on-the-ground actions. It bridges the gap between knowing the hazards and actively controlling them during the task itself.
Weak templates stay vague. Strong ones replace lines like "handle chemicals safely" with steps you can audit, for example: wear nitrile gloves and goggles when decanting sodium hypochlorite, run local extraction, and spell out what to do if skin contact happens.
For mobile plant, a one-page SWP for an elevated work platform should call out ground rating, harness anchor points, and handover when the basket is occupied. Context matters: a large share of traumatic worker fatalities and serious claims still clusters in a handful of industries (including construction and manufacturing), which is why task-specific SWPs matter most where the harm data is worst.
At the end of the day, a procedure is only as good as its content and how it's actually used. By starting with a good template, you make yourself include all the critical elements, like hazard identification, required PPE, and emergency steps, right from the outset.
For a deeper look into identifying risks before they become incidents, it’s worth learning more about the bowtie risk assessment model. It’s a great way to systematically think through potential risks and the barriers you need to put in place.
How to Find and Choose the Right SWP Template
Not all templates are the same. Finding the right safe work procedures template is the first real, practical step towards creating documents your team will actually pick up and use. Your choice will ultimately come down to a balance of cost, how specific it is to your industry, and how much customisation you're willing to put in.
A great place to start is with government and regulatory bodies. For instance, Safe Work Australia and similar state-based agencies often provide free, downloadable templates. These are solid, compliance-focused documents that cover the legal basics you need to meet your WHS obligations.
But there's a trade-off. They're usually quite generic. You'll need to invest the time and effort to adapt them for your specific tasks, machinery, and unique worksite hazards.
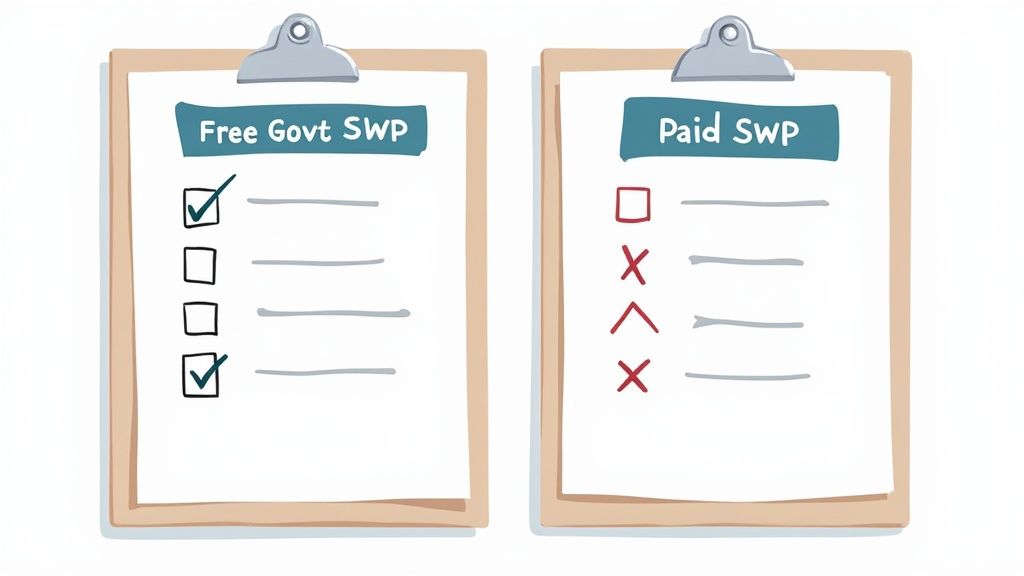
Paid vs. Free Templates: What’s the Real Difference?
On the other end of the spectrum, you’ll find paid templates from safety consultants or specialised providers. These are typically more detailed and already tailored to specific sectors like civil construction, manufacturing, or electrical work.
A paid template for a "working at heights" procedure, for example, will likely come pre-loaded with common hazards and controls relevant to that task, which can save you a huge amount of time. The main benefit is that specificity, it gets you much closer to a finished, usable document straight out of the box. The obvious downside is the cost, which can vary significantly.
The best template isn't necessarily the most expensive one. It's the one that provides a clear, logical structure that your team can easily understand and that you can realistically adapt to your specific work environment.
To help you weigh the pros and cons, here’s a quick comparison of what you can generally expect.
Free vs Paid SWP Templates: A Quick Comparison
| Feature | Free Templates (e.g., Safe Work Australia) | Paid Templates (e.g., Safety Consultants) |
|---|---|---|
| Cost | Free to download and use. | A one-time purchase or ongoing subscription fee. |
| Specificity | Generally broad to cover all industries. | Often tailored to specific high-risk industries or tasks. |
| Customisation Effort | High. You'll need to add all task-specific details yourself. | Lower. Much of the specific information is already there. |
| Compliance Focus | Strong focus on meeting minimum legal WHS requirements. | Usually includes best practice advice beyond basic compliance. |
| Support | None. You are on your own to interpret and complete it. | Often comes with guidance or direct support from the provider. |
Ultimately, choosing a template is just the first step. You still need to integrate it into your wider safety framework.
To really understand how SWPs fit into your overall system, it’s worth looking into an occupational health and safety management plan template. This will give you the bigger picture of how all your safety documents work together to manage risk effectively across your entire operation.
Customising a Template for Your Workplace
A generic safe work procedures template is a starting point, not the finish line. Its real value comes from turning that basic structure into a practical, site-specific guide that your team can actually use. Without customisation, a template is just another piece of paper gathering dust.
The only way to get this right is to get out on the floor. You need to walk through the task with the people who do it every single day, breaking it down into its core steps. Forget the office perspective; you need to see the job as it actually happens, with all its real-world variables and shortcuts.
Identify Your Unique Hazards
Every worksite has its own personality and, with it, a unique set of risks that a generic template will never capture. As you walk through the task analysis, your job is to spot these specific hazards. Is there a persistent oil spill near the lathe that everyone just steps over? Are extension cords creating a trip hazard in the main walkway?
These are the details that make a procedure truly effective. Documenting them is crucial.
- Environmental Risks: Look for things like poor lighting in a storage area, uneven flooring between workstations, or excessive noise bleeding over from nearby machinery.
- Equipment-Specific Hazards: Check for missing machine guards, worn-out emergency stop buttons, or those non-standard modifications made to equipment over the years.
- Process-Related Risks: Observe how people actually move materials. Are workers taking shortcuts that create new risks, like carrying an awkward load that completely blocks their view?
This process of digging into the specifics is very similar to what's involved in other key safety documents. If you want to see this hazard identification process in action, you can explore some detailed https://safetyspace.co/job-safety-analysis-examples from our library to get a better feel for it.
Write for Clarity and Action
Once you've got a handle on the hazards, it’s time to write the control measures in plain, simple language. Ditch the jargon and overly technical terms. The instructions must be so clear that a new worker on their first day could read them and know exactly what to do.
The goal is to create instructions, not a legal document. Use short sentences, active verbs, and a logical, step-by-step format. If a step is confusing, it's a weak point in your safety system.
To get this right, it's helpful to understand the principles behind how to create standard operating procedures. This will give you a solid framework for structuring your instructions for maximum clarity and impact.
Make It Visual
Here’s a simple truth: people process images far faster than text. When you add photos of your actual worksite and equipment into the procedure, it becomes instantly recognisable and much more practical for your team.
For instance, instead of just writing "Isolate the power source," include a photo of the specific lockout point on your machine, with a big red arrow pointing right at it. This removes all the guesswork.
- Show, Don't Just Tell: Add a picture of the exact personal protective equipment (PPE) required for the task.
- Highlight Key Controls: Use photos to show the location of emergency stops, fire extinguishers, or first aid kits.
- Illustrate Complex Steps: A series of photos can break down a complicated sequence into easy-to-follow visual cues.
These customisations are not just nice-to-haves; they're critical. In Australia, the statistics from Safe Work Australia show just how vital targeted safety procedures are. In one recent year, there were 200 work-related fatalities, with unsafe vehicle incidents making up a staggering 42% of those deaths.
This is a stark reminder of why your safe work procedure templates must include very specific, crystal-clear controls for any vehicle and machinery operation on your site. Don't just gloss over it, get detailed.
Putting Your Safe Work Procedures into Action
Creating a detailed, customised safe work procedure is a solid start, but a document sitting in a folder has never prevented an accident. The real test is getting it off the page and into the hands and minds of your team on the floor.
A procedure is only effective when it becomes a routine part of how the job is done. Not just another piece of paper, but a tool used daily.
This means we need to move beyond just handing out papers and expecting people to read them. Practical, hands-on training is what makes safety information stick.
Making Training Practical and Effective
The most effective training happens where the work actually happens. Forget long classroom sessions that put everyone to sleep. The focus should be on short, sharp, and relevant methods that connect directly to the task at hand.
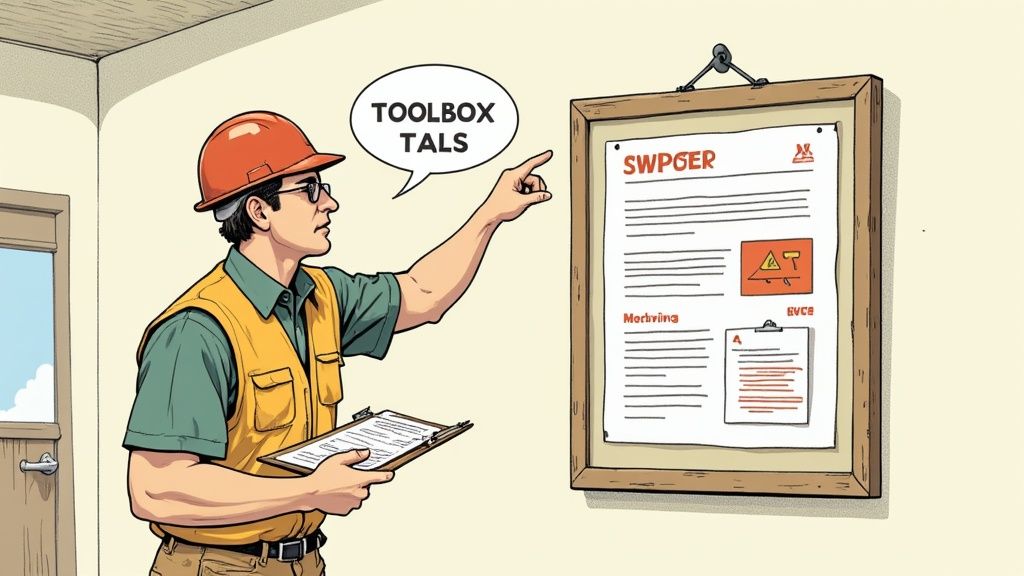
- Toolbox Talks: Start the day or shift with a quick 5–10 minute discussion focused on a specific SWP. This keeps the information fresh and top-of-mind for the day's work. It’s incredibly effective.
- On-the-Job Demonstrations: Have an experienced supervisor or team member walk through the procedure step-by-step, right there at the workstation. This visual and physical run-through is far more memorable than reading a document.
- "What If" Scenarios: During a demonstration, throw in a few curveballs. Ask questions like, "What would you do if this guard jammed?" This forces critical thinking and makes sure workers understand the emergency steps, not just the routine ones.
This direct approach ensures the team doesn't just know the procedure exists; they understand how to apply it under real-world pressure.
A safe work procedure isn't a training manual to be memorised. It's a live tool for the job, just like a wrench or a measuring tape. It needs to be accessible, understood, and used every single day.
It's a principle that applies beyond just safety. For instance, implementing Performance Improvement Plan Templates also relies heavily on clear communication and consistent application to be effective.
Storing and Displaying Procedures for Easy Access
Where you keep your SWPs matters just as much as what's in them. If a worker has to leave the workshop, walk to an office, and sift through a filing cabinet to find a procedure, they simply won't do it. The documents must be immediately available where the tasks are performed.
Think about these practical storage solutions:
- Laminated Copies at Workstations: Attach a durable, laminated copy of the relevant SWP directly to the machine or in the work area it applies to. Simple, but it works.
- Centralised Site Binders: Keep a clearly labelled binder in a common, easily accessible area on the workshop floor or in the site shed.
- Digital Access on Tablets: For mobile teams or larger sites, having SWPs available on ruggedised tablets allows for instant access anywhere, right on the spot.
The goal is to remove every possible barrier. Make it so easy to look up a procedure that it’s faster than guessing.
Keeping Your SWPs Current with a Simple Review Schedule
Workplaces are not static. Equipment gets updated, processes are tweaked, and new hazards can emerge without warning. A safe work procedure written a year ago might be dangerously out of date today.
A simple, consistent review schedule is essential to keeping your documents relevant and effective. You don't need a complex system, just a reliable one.
Plan to review and update your SWPs in these situations:
- After any incident or near-miss: This is your most critical learning opportunity. Don't waste it.
- When new machinery or substances are introduced: The procedure must reflect the new equipment's specific risks and operating instructions.
- If the task itself changes: Even small tweaks to a process can introduce new, unforeseen hazards.
- Annually, as a minimum: Schedule a yearly check-up for all SWPs, even if nothing has obviously changed. This disciplined approach ensures nothing important slips through the cracks.
When most of us think about Safe Work Procedures, we picture a construction site or a factory floor. But the world of work has changed, and our approach to safety documentation needs to catch up.
The core idea is the same, spot the hazards, put controls in place, but the risks look a whole lot different when your "worksite" is a spare bedroom or involves new wearable tech.
A traditional SWP template can feel clunky when you try to apply it to a home office setup. But here's the thing: your legal responsibility to provide a safe working environment doesn't end at the office door. For remote and hybrid teams, the focus just shifts from machinery hazards to things like poor ergonomics and the psychological toll of working in isolation.
Your SWP template has to be flexible enough to tackle these modern challenges head-on.
What About Remote and Hybrid Work Risks?
For your team members working off-site, SWPs should offer clear, practical advice on setting up a safe space. This isn't about being a micro-manager; it's about fulfilling your duty of care with genuinely helpful guidance.
- Ergonomic Setups: Don't overcomplicate it. A simple checklist for a good workstation setup goes a long way. Think chair height, monitor position, and keyboard placement to head off those common musculoskeletal injuries.
- Managing Isolation: You need to directly address the risks of working alone. Your procedure should spell out required check-in schedules, communication protocols, and who to contact for mental health support. Make it obvious and easy.
- Emergency Procedures: What happens if a remote worker has a medical emergency? The SWP needs to detail the exact process for notifying the company and the key contacts. No ambiguity.
Making these adjustments shows that a good safe work procedures template is a versatile tool for protecting your entire team, no matter where they happen to be logging in from.
A modern SWP isn't just about avoiding physical injury from a piece of equipment. It’s a complete guide to working safely in any designated workplace, including that desk you've squeezed into the corner.
The evolving landscape of Australian workplaces means safety procedures now have a much broader scope. As hybrid models become the norm, templates are being adapted for new risks like ergonomic strain from home offices and the mental health challenges of remote work. You can find more insights into these trends from the team at Fire and Safety Australia.
Weaving in New Workplace Technology
It’s not just about remote work. Technology is also changing how we manage safety on traditional sites. From AI-powered monitoring to wearable devices, new tools are creating safer environments, and your SWPs have to keep pace.
Let's say you roll out wearable devices that detect falls or monitor fatigue. You can't just hand them out and hope for the best. The SWP for the relevant task must be updated.
The procedure needs to explain how the tech works, what data it's collecting, and the exact steps to follow when it triggers an alert. This ensures the technology is actually used correctly and becomes a seamless part of your safety system, not just a gadget.
By doing this, your SWP template stops being a static, dusty document and becomes a living guide that grows right alongside your business.
Common Questions About SWP Templates
Even with a solid plan, questions always pop up when you start putting a safe work procedures template into practice. Getting clear, practical answers is key to using them correctly and making sure they actually keep your team safe on site.
Let's tackle some of the most common questions we hear from teams in construction and manufacturing.
SWMS vs SWP: What Is the Difference?
This is easily one of the most frequent points of confusion, and for good reason.
A Safe Work Method Statement (SWMS) is a specific legal document required in Australia for any task defined as 'high-risk construction work'. It's laser-focused on identifying those high-risk hazards and listing the controls to manage them. Nothing more, nothing less.
A Safe Work Procedure (SWP), on the other hand, is much broader. Think of it as a detailed, step-by-step guide on how to perform any task safely, not just the high-risk ones. It's a versatile tool that can be used in any industry, whether you're operating a press brake in a factory or handling chemicals in a workshop.
The easiest way to remember it? A SWMS is a legally mandated document for a narrow set of high-risk jobs. An SWP is your practical 'how-to' guide for ensuring safety across all of your day-to-day tasks.
How Often Should We Review Our SWPs?
There isn't a single, rigid timeline that fits every business, but a practical review schedule is crucial. The biggest mistake you can make is writing them and filing them away to gather dust. Your procedures must be treated as living documents.
A good rule of thumb is to review your SWPs in these four situations:
- After any incident or near-miss. This is your most direct feedback that something in the procedure is wrong, unclear, or just isn't working in practice.
- When you introduce new equipment, chemicals, or processes. The procedure has to be updated to reflect the new hazards and controls before anyone starts the new work.
- If laws or industry standards change. Your procedures must always align with current compliance requirements to avoid any legal headaches.
- On a regular schedule, typically once a year, even if nothing has changed. This proactive check ensures nothing has been overlooked and that the procedure is still relevant.
Who Should Write the Safe Work Procedure?
Writing an SWP should never be a one-person job completed in isolation from behind a desk. The most effective and practical procedures are always a team effort, grounded in real-world experience.
The best approach is a collaborative one, involving the people who know the task inside and out. Your writing team should always include:
- Experienced Workers: These are the people who perform the task every single day. They have the critical, hands-on knowledge of the real risks and, more importantly, the most workable solutions.
- Direct Supervisors: They oversee the work and can ensure the procedure is both practical for the team on the ground and meets the operational needs of the business.
A safety manager can certainly guide the process, provide the correct safe work procedures template, and check for final compliance. But the core content, the steps, the hazards, the controls, must come from your frontline team if you want it to be effective.
Managing all this documentation can quickly feel overwhelming. Safety Space replaces scattered paperwork and clunky spreadsheets with a single, easy-to-use platform. Get real-time oversight, simplify compliance, and give your team the tools they need to work safely and efficiently. Book a free demo to see how Safety Space can transform your H&S management.
Ready to Transform Your Safety Management?
Discover how Safety Space can help you build a safer, more compliant workplace with our comprehensive safety management platform.
Book a Free DemoRelated Topics
Safety Space Features
Explore all the AI-powered features that make Safety Space the complete workplace safety solution.
Articles & Resources
Explore our complete collection of workplace safety articles, tools, and resources.