
A Take 5 risk assessment is that quick, on-the-spot safety check you do right before you start a job. It's a simple mental and written process designed to make you pause, look around, and think about the immediate hazards in your work area. The goal isn't to create a mountain of paperwork; it's to quickly decide if it's safe to start.
What a Take 5 Risk Assessment Really Means for You
Think of it as your personal safety pause before you pick up a tool or fire up a machine. This isn't some theoretical exercise dreamed up in an office; it's a practical tool for the person actually doing the work, right there on the ground. The whole process is built to be fast, simple, and effective, especially for workers in high-risk industries like construction and manufacturing.
Its real purpose is to stop incidents before they happen by making you aware of your surroundings. It simply asks you to stop for a moment, look around, and think about what could realistically go wrong with the task you're about to do. This quick check helps you spot dangers that might have been missed in a more formal, pre-planned assessment.
The Five Core Steps
The Take 5 process is broken down into five distinct actions. Each one builds on the last, creating a logical flow from observation to getting the job done safely. These steps are your mental checklist to run through before you get started.
Let's break them down.
Here is a quick overview of what each step involves.
The Five Steps of a Take 5 at a Glance
| Step | What It Means |
|---|---|
| Stop | Pause all activity and focus completely on the task ahead of you. |
| Think | Consider the steps involved in the job from start to finish. |
| Identify | Look and listen for potential hazards in your immediate surroundings. |
| Control | Figure out what you can do to remove or reduce each risk you've spotted. |
| Proceed | Once controls are in place and the task is safe, begin your work. |
This simple framework guides you from a quick pause to a confident, safe start.
The real power of a Take 5 isn't in filling out a form, but in the deliberate act of pausing. It’s about shifting your mindset from just 'getting the job done' to 'getting the job done safely' by taking a moment to actually look at your work environment.
Why This Quick Check Matters
In Australia, the "Take 5" method has become a key part of work health and safety (WHS). It directly addresses the need for proactive hazard identification, which is critical for reducing on-the-job injuries. The stats don't lie. Safe Work Australia reported that our country recorded 188 worker fatalities from traumatic workplace injuries in a single year, a stark reminder of the constant presence of risk. For a closer look at the data, you can explore the latest Australian workplace safety data.
This simple, repeatable process helps turn high-level safety plans into real, on-the-ground action. To get good at spotting these dangers, it helps to have a solid grasp of what is hazard identification and how to apply it in different settings.
If you want to see how this quick assessment fits into the bigger picture, the principles of construction project risk management offer a wider view of managing safety across an entire site.
Putting The Take 5 Into Practice: A Real-World Walkthrough
Theory is great, but a take 5 risk assessment only proves its worth when it’s applied on the tools. Let's walk through a common scenario to see how it works in the real world: setting up temporary scaffolding on a busy construction site.
We'll follow a worker, let's call him Dave, as he runs through the process before the work kicks off.
This diagram breaks down the basic flow of a Take 5 into five clear, sequential actions.
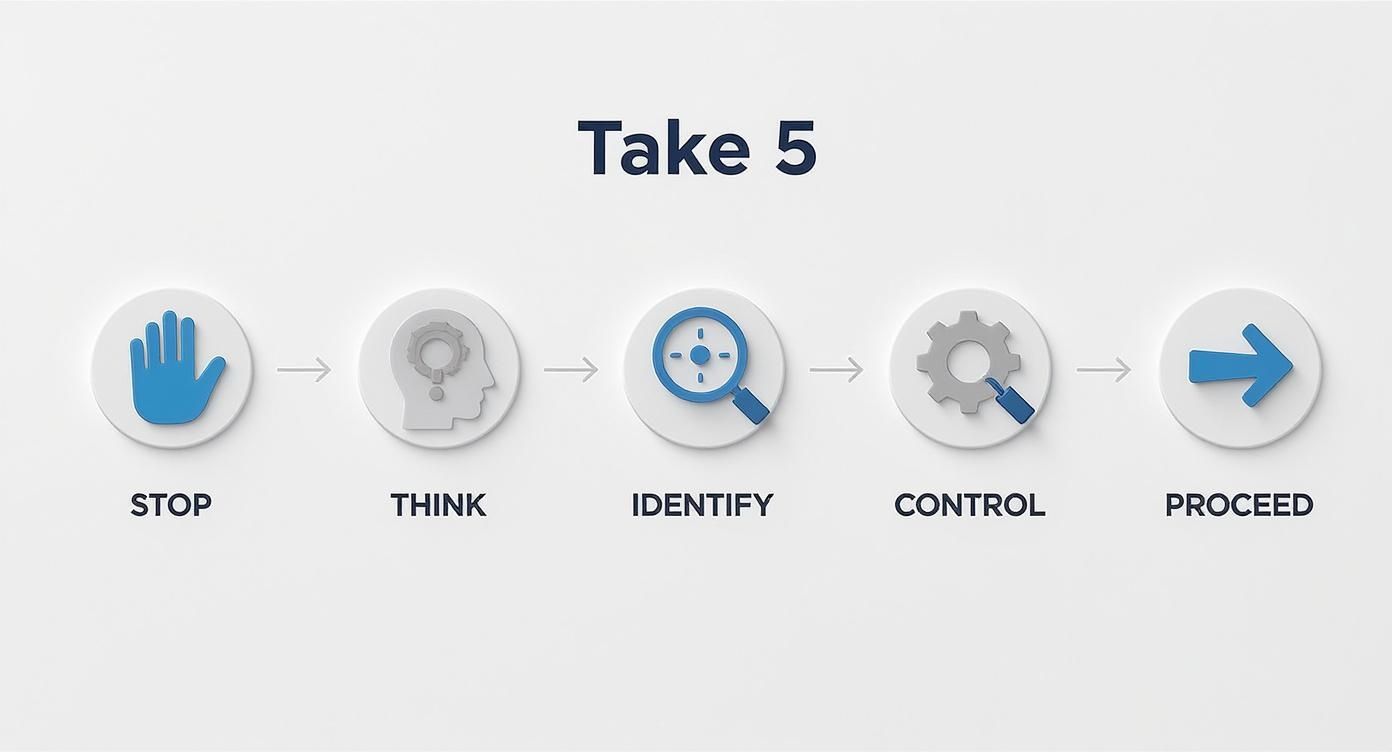
Each icon represents a distinct phase, guiding a worker from the initial pause right through to getting the job done safely with the right controls in place.
Think Through The Task
Before a single piece of scaffolding is touched, Dave stops. He takes a moment to mentally walk through the entire job, from start to finish. He’s not just thinking about the end result; he’s visualizing the specific actions he and his team will need to take.
He maps out the sequence in his head:
- Unloading the scaffold components from the truck.
- Carrying all the pieces over to the setup area.
- Laying out the base plates and standards.
- Erecting the first level, including ledgers and transoms.
- Installing planks to create the first working platform.
- Building the next levels, making sure everything is plumb and secure.
- Finally, attaching the handrails and toe boards.
This mental rehearsal isn't about rushing. It's about building a clear picture of the work, which makes it far easier to spot where things might go wrong. He’s establishing a baseline for what a "normal" and safe job looks like in his mind.
Spot The Hazards
With the task clear in his mind, Dave now scans his actual work environment. He’s actively looking and listening for anything that doesn't match the safe scenario he just visualized. This is the "Identify" part of the process, and it’s where his experience really kicks in.
He immediately spots three things that are out of place:
- Uneven Ground: The area where the scaffold base needs to go is a mix of dirt and loose gravel, with a noticeable slope. This could make the entire structure unstable from the get-go.
- Overhead Power Lines: About five metres above the work area, there are live power lines. As the scaffold gets higher, the risk of a pole or tool making accidental contact becomes very real.
- Nearby Vehicle Traffic: A narrow access road runs just a few metres away from the setup location. Delivery trucks and site utes are using it constantly, creating a serious risk of collision.
These aren't vague, theoretical risks; they are immediate, tangible problems in his direct work area. He’s identified the specific things that could cause an incident right here, right now.
A hazard isn't just something that feels dangerous. It’s a specific condition or object with the potential to cause harm. Spotting the difference between a vague feeling and a concrete hazard is the key to an effective Take 5.
Assess The Risk
Now that Dave has a list of hazards, he needs to quickly judge how serious each one is. He’s not using a complicated matrix or scoring system; he’s making a practical judgment call based on two simple questions: How likely is it to happen? And if it does, how bad will it be?
- Uneven Ground: The likelihood of the scaffold becoming unstable is high if nothing is done. The consequence could be a collapse, which is catastrophic. This is a top-priority risk.
- Overhead Power Lines: The likelihood of contact might seem low at first, but it increases as they build higher. The consequence of an electrical strike is fatal. This is also a top-priority, stop-the-job kind of risk.
- Vehicle Traffic: The likelihood of a vehicle straying into the work area is moderate, given the site's activity. The consequence could range from a minor bump to a serious injury. This risk definitely needs managing.
This quick mental sorting helps him focus on what matters most. The goal is to understand the potential for harm before it has a chance to occur. If you’d like a deeper look into this concept, our guide on how to do a risk assessment provides more detail on judging likelihood and consequence.
Make Changes
With the risks prioritized, Dave moves to the "Control" phase. He can’t start the job until he has practical solutions in place for the hazards he found. This is about taking direct action, not just ticking a box.
Here’s what he does:
- For the uneven ground, he gets sole boards and adjustable base plates (screw jacks). This will create a solid, level foundation for the scaffold, eliminating the risk of instability at its source.
- For the overhead power lines, he immediately contacts the site supervisor. They confirm a permit has been issued and the lines have been de-energized and earthed by a qualified person. He gets visual confirmation before proceeding.
- For the vehicle traffic, he sets up a physical exclusion zone using cones and barrier tape. This clearly marks off the work area, preventing vehicles from accidentally driving in. He also places a spotter to manage any necessary vehicle movements nearby.
These aren't complicated fixes, but they are incredibly effective because each control directly addresses a specific hazard he identified.
Do The Job Safely
With all the controls in place, Dave and his team are now ready to "Proceed". But the Take 5 process doesn't stop here. As they start erecting the scaffold, they keep monitoring the situation.
They make sure the exclusion zone remains intact and that vehicles are respecting it. They double-check that the base is still level and stable as they add more weight. The Take 5 has created a state of heightened awareness that they carry with them throughout the entire task, ensuring the controls they put in place continue to work until the job is done.
Common Hazards and Controls for Your Industry
A take 5 risk assessment is only as good as your ability to spot real-world hazards. Let's be honest, knowing what to look for is half the battle. This guide will give you a practical starting point for some of the most common issues you'll run into in construction and manufacturing. Think of it as a cheat sheet for your next on-the-spot check.
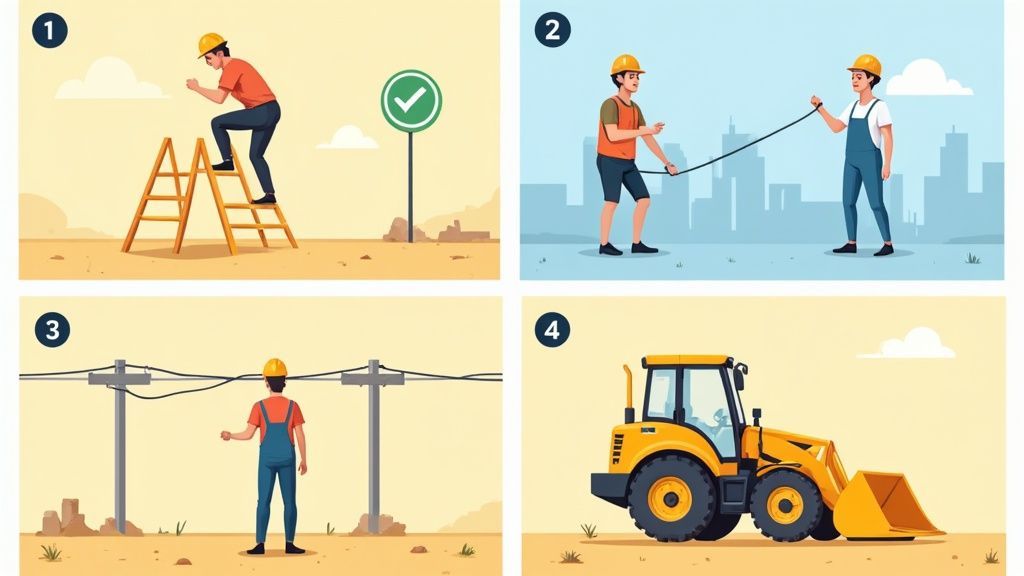
Working at Heights
Falls from height are a leading cause of serious injury and death on work sites. It’s a risk that should never be taken for granted, even for what seems like a quick two-minute job.
- Hazard: An unstable ladder on soft or uneven ground. We've all seen it.
- Control: Get it on a firm, level surface. If you can't, use a ladder leveller or secure sole boards underneath. And always, always maintain three points of contact.
- Hazard: Unprotected edges on scaffolding or mezzanines.
- Control: Before you start work, physically check the guardrails, mid-rails, and toe boards. Are they secure? If anything is missing, stop the job and get it fixed. No exceptions.
- Hazard: Over-reaching from an Elevated Work Platform (EWP) basket.
- Control: The fix is simple: position the EWP as close to the work as possible. If you can't reach, don't lean. Lower the platform and reposition the whole unit. It takes a minute but could save you from a serious fall.
Manual Handling
Lifting, carrying, and moving materials the wrong way can lead to sprains, strains, and chronic back problems. These risks are hiding in plain sight in almost every single task.
- Hazard: Trying to lift heavy or awkward objects alone.
- Control: Use the tools available. Trolleys, pallet jacks, or forklifts are there for a reason. If that’s not an option, make it a team lift with clear communication.
- Hazard: Twisting your body while carrying a load.
- Control: Hug the load close to your body and turn by moving your feet. Don't twist at the waist. That’s how you put immense pressure on your spine.
- Hazard: Repetitive movements without a break, leading to fatigue and injury.
- Control: Rotate tasks with others on your team. It's crucial to take short, regular breaks to stretch and recover, especially when you're doing the same thing over and over.
The most effective control is often the simplest one. Before you lift something heavy, just ask: "Is there an easier way to move this?" That single question can prevent a significant number of manual handling injuries.
Electrical Hazards
Electricity is an invisible killer on any site. The golden rule is to assume all wiring is live until proven otherwise and treat every electrical tool with respect.
- Hazard: Damaged leads or power tools with frayed cords.
- Control: Do a quick visual check of all electrical gear before you plug it in. If you spot any damage, immediately take it out of service, slap an "Out of Service" tag on it, and report it.
- Hazard: Using electrical equipment in wet or damp conditions.
- Control: Make sure the gear is rated for outdoor or wet use. Crucially, always plug into an outlet protected by a Residual Current Device (RCD). As part of your risk assessment, understanding RCD power board safety is non-negotiable for protecting your crew from electric shock.
- Hazard: Working near unidentified underground or overhead power lines.
- Control: Always consult site plans and use a service locator ("Dial Before You Dig") before any excavation. For overhead lines, establish clear, non-negotiable exclusion zones.
Moving Machinery and Vehicles
The interaction between people and mobile plant is one of the most dangerous situations on any work site. Constant situational awareness isn't just a buzzword; it's your most important defense.
- Hazard: Walking into the blind spots of large machinery like excavators or loaders.
- Control: Always, and I mean always, make eye contact with the operator before you get anywhere near their machine. Stay well clear of designated swing zones and travel paths.
- Hazard: Unguarded moving parts on fixed machinery, like conveyors or presses.
- Control: Before you hit the 'on' switch, verify that all physical guards are properly in place and that the emergency stops are working. Never, ever remove a guard while the machine is running.
- Hazard: Pedestrians and vehicles sharing the same space without clear separation.
- Control: Use the designated walkways and crossings. Set up clear exclusion zones around active vehicle areas using physical barriers like cones or barrier tape. And never assume a driver has seen you.
To make this even more practical, here's a quick reference table you can use to connect common hazards with effective controls during your Take 5.
Quick Reference Hazard and Control Matrix
| Hazard Category | Example Hazard | Practical Control |
|---|---|---|
| Slips, Trips, Falls | Trailing cables across a walkway | Secure cables overhead, use cable covers, or reroute them away from foot traffic. |
| Chemical Exposure | Unlabelled container of cleaning solvent | Immediately label the container with contents and hazards. Refer to the Safety Data Sheet (SDS). |
| Noise | Operating a loud generator near a work area | Relocate the generator further away. Mandate hearing protection (earplugs/earmuffs) within the zone. |
| Ergonomics | Working in an awkward, stooped posture for hours | Use adjustable workbenches or platforms. Schedule regular breaks for stretching. |
| Fire | Storing flammable liquids near an ignition source | Relocate liquids to a designated, ventilated flammable goods cabinet. Ensure fire extinguisher is nearby. |
This matrix isn't exhaustive, but it shows how quickly you can think through a problem on the spot. The goal of a Take 5 isn't to write a novel. It's to pause, identify the immediate risks, and put a sensible control in place before you get hurt.
Getting Your Team to Actually Use Take 5s
Let's be honest. A completed Take 5 risk assessment form means nothing if the person who filled it out was on autopilot. The real challenge isn’t teaching the five steps; it’s getting your team to actually pause and think.
If a Take 5 feels like just another piece of compliance paperwork, workers will treat it that way. The goal is to turn this quick check into a useful, ingrained habit. A genuinely completed Take 5 is one of the most effective tools a worker has. A box-ticking exercise, however, is just a waste of five minutes that creates a false sense of security.
Lead from the Front
Want to show your team that Take 5s are just a formality? Never do one yourself.
But if you want to prove they matter, the best way is to lead by example. Your actions as a supervisor set the standard for what's important on site, and your crew is always watching.
When you arrive at a work area, do your own Take 5. Make sure your crew can see you doing it. Better yet, talk it through out loud: "Okay, looks like we've got some water pooling over here, that's a slip hazard. And this temp lead isn't strung up properly, someone could easily trip on that."
This isn't about putting on a show. It's about demonstrating that this is simply how work gets done safely on your site. When the team sees you taking it seriously, they're far more likely to follow suit.
Keep It Fast and Simple
Workers will naturally resist anything that feels like a bureaucratic burden slowing them down. If your Take 5 process involves a complicated, multi-page form for a simple task, you've already lost the battle. The process has to be quick, simple, and directly relevant to the job at hand.
Here’s how to make it practical:
- Use simple pocketbooks or a fast digital form. The tool should be easy to grab and fill out in a minute or two, not a hassle to find and complete.
- Focus on the immediate work area. A Take 5 isn't a comprehensive Safe Work Method Statement (SWMS). It’s about the here and now: the ground conditions, the nearby machinery, the specific tool you're about to pick up.
- Ditch the jargon. The questions should be in plain language that anyone can understand. Think "What could fall on me?" or "What could I trip on?".
The easier you make it, the less resistance you'll face. The name says it all: it should take five minutes, not fifteen.
Make It Part of the Conversation
Don't just collect the forms at the end of the day and file them away. That sends a clear message that they don't really matter. Instead, use them as a starting point for safety conversations.
During your toolbox talks, bring them up. Ask practical questions that connect directly to what your team is seeing on the ground. Try asking things like, "What was the most unexpected hazard anyone spotted on their Take 5 this morning?" or "Did anyone's Take 5 make them change how they were planning to do a job?"
This approach does two crucial things. First, it holds people accountable for actually doing a proper assessment. Second, it shares valuable safety knowledge across the entire team. A hazard one person spots might be something another person has completely overlooked.
When a worker stops a job because of a risk they found on their Take 5, that isn't a delay. That is a success. Frame it that way. Publicly thank them for being vigilant and preventing a potential incident.
This kind of positive reinforcement is absolutely critical. If workers fear being criticized for "slowing things down," they’ll stop raising issues. But if they see that stopping the job to fix a hazard is valued, they'll feel confident to speak up, making the entire site safer for everyone.
Moving Beyond Paper with Digital Take 5 Tools
For years, the standard take 5 risk assessment has lived on a soggy, coffee-stained piece of paper shoved in a back pocket. We’ve all seen it. Handwriting can be impossible to read, forms get lost, and even the perfectly completed ones end up in a filing cabinet, never to be seen again.
This creates a massive blind spot for supervisors. You have no real-time idea if the checks are being done properly, or if they're being done at all. The old paper-based way makes it nearly impossible to spot trends or get a clear, immediate picture of what’s happening on your sites.
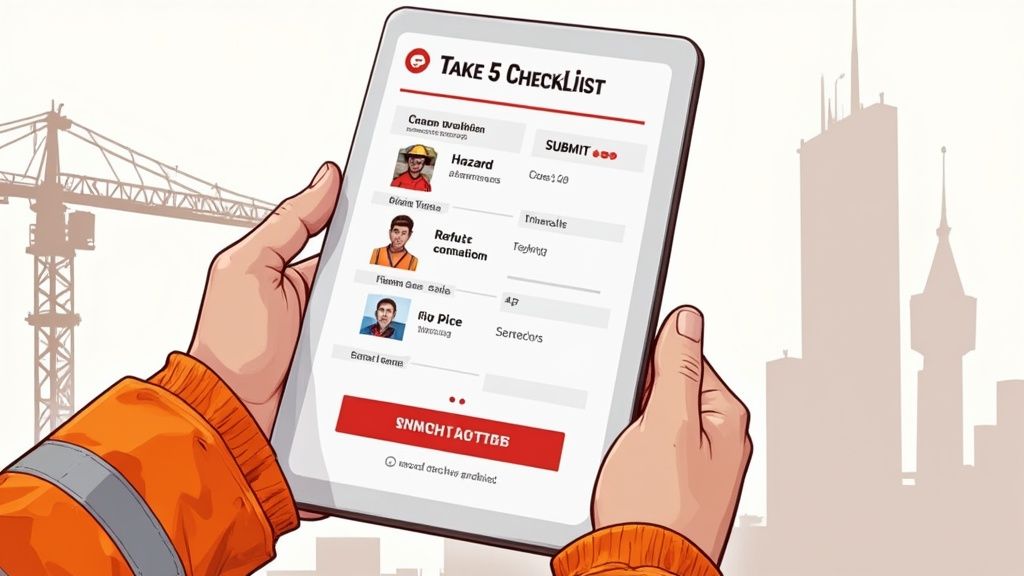
Shifting to a digital tool isn't just about saving a few trees; it’s about fixing these fundamental problems and making the whole process accountable and genuinely effective.
Get Instant Visibility Across Your Sites
One of the most powerful changes you’ll see when going digital is immediate oversight. When a worker completes their Take 5 on a phone or tablet, that information is instantly available to their supervisor, no matter where they are. This is a total game-changer for managing multiple sites or sprawling projects.
Imagine you're a supervisor juggling three different construction sites across the city. With a paper system, you’d have to physically drive to each one just to check the safety paperwork. Digitally, you can see from your ute or the office that all pre-start checks were done on time.
You can immediately see:
- Who completed the assessment and at what time.
- What hazards were identified at each location.
- What controls were put in place before work kicked off.
This real-time data allows you to manage risk proactively instead of just reacting to incidents after they happen. You can spot if a particular crew is consistently missing obvious hazards or if a site has a recurring issue that needs a proper, permanent fix.
Capture Better Information with Rich Media
A handwritten description of a hazard can be incredibly vague. What one person calls a "messy work area" could be a minor housekeeping issue or a serious trip hazard with exposed rebar. Digital tools get rid of this ambiguity by letting workers attach photos and videos directly to their reports.
A picture of a frayed electrical lead or an unstable trench wall tells a much clearer and more urgent story than words alone. This visual evidence makes it easier for everyone to understand the exact nature of the risk and the effectiveness of the control.
This feature is just incredibly practical. Instead of trying to describe a complex situation in writing, a worker can just snap a photo, add a quick note, and submit it. The reporting process becomes faster for them and provides far richer, more useful data for the safety team.
Turn Your Data into Actionable Insights
A stack of 500 paper Take 5 forms is just a fire hazard. It's practically impossible to pull any meaningful information from it. But 500 digital records? That's a goldmine of safety intelligence.
When your Take 5 data is collected digitally, you can easily filter, sort, and analyze it to spot trends that would otherwise be completely invisible.
- Are slip-and-trip hazards being reported more often on one site? This could point to a drainage or housekeeping problem that needs a systemic solution.
- Is "manual handling" repeatedly listed by a specific team? That might signal a need for more mechanical aids or better training on proper lifting techniques.
- Are near-misses involving mobile plant happening around the same time each day? This could highlight an issue with traffic management during peak delivery hours.
This ability to see recurring problems is how you make lasting safety improvements. Instead of just putting out spot fires every day, you can identify the root causes and implement site-wide changes to prevent them from happening again. Exploring a modern employee safety app can show you how these features work together to build a more responsive safety system.
Make the Process Faster for Your Team
Let’s be honest: if a safety process is a hassle, people will find ways to avoid it. Digital tools can make the Take 5 faster and easier for the workers on the ground, which is the key to getting their buy-in and ensuring it’s done consistently.
A digital form can be pre-filled with the project name, location, and date, saving the worker from writing out the same details over and over. You can also build templates with common hazards for specific tasks, allowing them to quickly select relevant risks instead of writing them out from memory.
This isn't about cutting corners. It's about getting rid of the tedious admin so your team can focus on what actually matters: looking critically at their work area and thinking about the hazards. When the tool is fast and easy to use, it becomes a helpful habit, not just another chore to tick off.
Your Take 5 Questions, Answered
Even with a simple process like the Take 5, questions always crop up on site. We get it. Getting straight, practical answers helps everyone use this tool properly and, most importantly, keeps the job safe. Here are some of the most common questions we hear from the crew and their supervisors.
How Often Should I Do a Take 5?
A Take 5 isn't a "tick-the-box-once-a-day" exercise. It's a dynamic tool.
You need to complete one before starting any new task. Simple. If you've just finished framing and now you're moving on to cladding, you need a new Take 5. Even if you're in the same spot, the task has changed, which means the hazards have changed.
You also need to hit pause and do another one if conditions change mid-task. Has it started raining, making the ground slippery? Has a delivery truck just pulled into your work zone? Have the sparkies started chasing concrete next to you? These are all triggers. The risks have shifted, so your assessment needs to as well.
What's the Difference Between a Take 5 and a SWMS?
This is a big one, and it causes a lot of confusion. Let’s clear it up. Think of it like this: a Safe Work Method Statement (SWMS) is the big-picture plan, while a Take 5 is the immediate, on-the-ground check.
- A SWMS is the formal, detailed document required for high-risk construction work. It's written before the job even starts, breaking down the entire process step-by-step, identifying the major known risks, and locking in specific controls. It’s the official safety blueprint for the whole operation.
- A Take 5 is your personal check right before you pick up the tools. It’s designed to catch the immediate, localized hazards that a SWMS can't predict. Things like a fresh oil spill from a leaky machine, a misplaced ladder, or a new overhead obstruction that wasn't there yesterday.
The SWMS is the strategic plan drawn up in the site office. The Take 5 is the tactical check you do on the ground, right at that moment. You absolutely need both. One doesn’t replace the other.
They’re a team. The SWMS sets the safety framework, and the Take 5 confirms your immediate work area is clear and safe right now.
What Do I Do if I Find a Major Risk?
If your Take 5 uncovers something serious, a hazard that could cause severe injury or worse, the next step is simple and non-negotiable: Stop the job immediately.
Don't try to "work around it" or just "be extra careful." The procedure is clear.
- Secure the Area: If you can do so safely, make the area safe. This could be as simple as putting up some cones or barrier tape. Never try to fix a major hazard yourself if it’s outside your expertise.
- Report to Your Supervisor: Get on the radio or find your supervisor or health and safety rep straight away. Clearly explain what you've found and show them the issue.
- Wait for Instructions: Do not, under any circumstances, restart work until the hazard has been properly controlled and your supervisor gives you the official all-clear.
Stopping the job because you found a major risk isn't causing a delay; you're preventing a disaster. It's exactly what the Take 5 process is for. Well done.
Ready to move beyond paper and get a real-time view of your team's safety checks? Safety Space swaps messy checklists for a simple, powerful digital platform. See every Take 5 as it’s completed, spot recurring hazards across all your sites, and make sure your team is safe and compliant. Get a free demo and see how it works.
Ready to Transform Your Safety Management?
Discover how Safety Space can help you implement the strategies discussed in this article.
Explore Safety Space FeaturesRelated Topics
Safety Space Features
Explore all the AI-powered features that make Safety Space the complete workplace safety solution.
Articles & Resources
Explore our complete collection of workplace safety articles, tools, and resources.