Downloading a blank form doesn't make a job compliant, and a SWMS template free download proves nothing until every field names this site, this sequence, this plant and the person who'll stop the work. Popular advice treats the file as the task. That reverses the job. The file is only a field structure. The compliance work is deciding whether the work needs a SWMS, writing controls that direct the crew, briefing the people exposed to the risk, and keeping evidence that the signed version was the version followed.
That test is stricter than most templates pass. If a control could apply to any site, it probably controls nothing on this one. If monitoring has no frequency, no named checker and no stop trigger, it's a hope written in a table cell. Treat the download as scrap paper until it carries measured heights, actual depths, named plant, real products and real names.
Table of Contents
- Check Whether This Job Needs a SWMS
- What the SWMS File Must Contain
- How to Complete the SWMS Before Work Starts
- A Worked Fall Over Two Metres Example
- Gate the Start, Brief the Crew and Keep the Record
Check Whether This Job Needs a SWMS
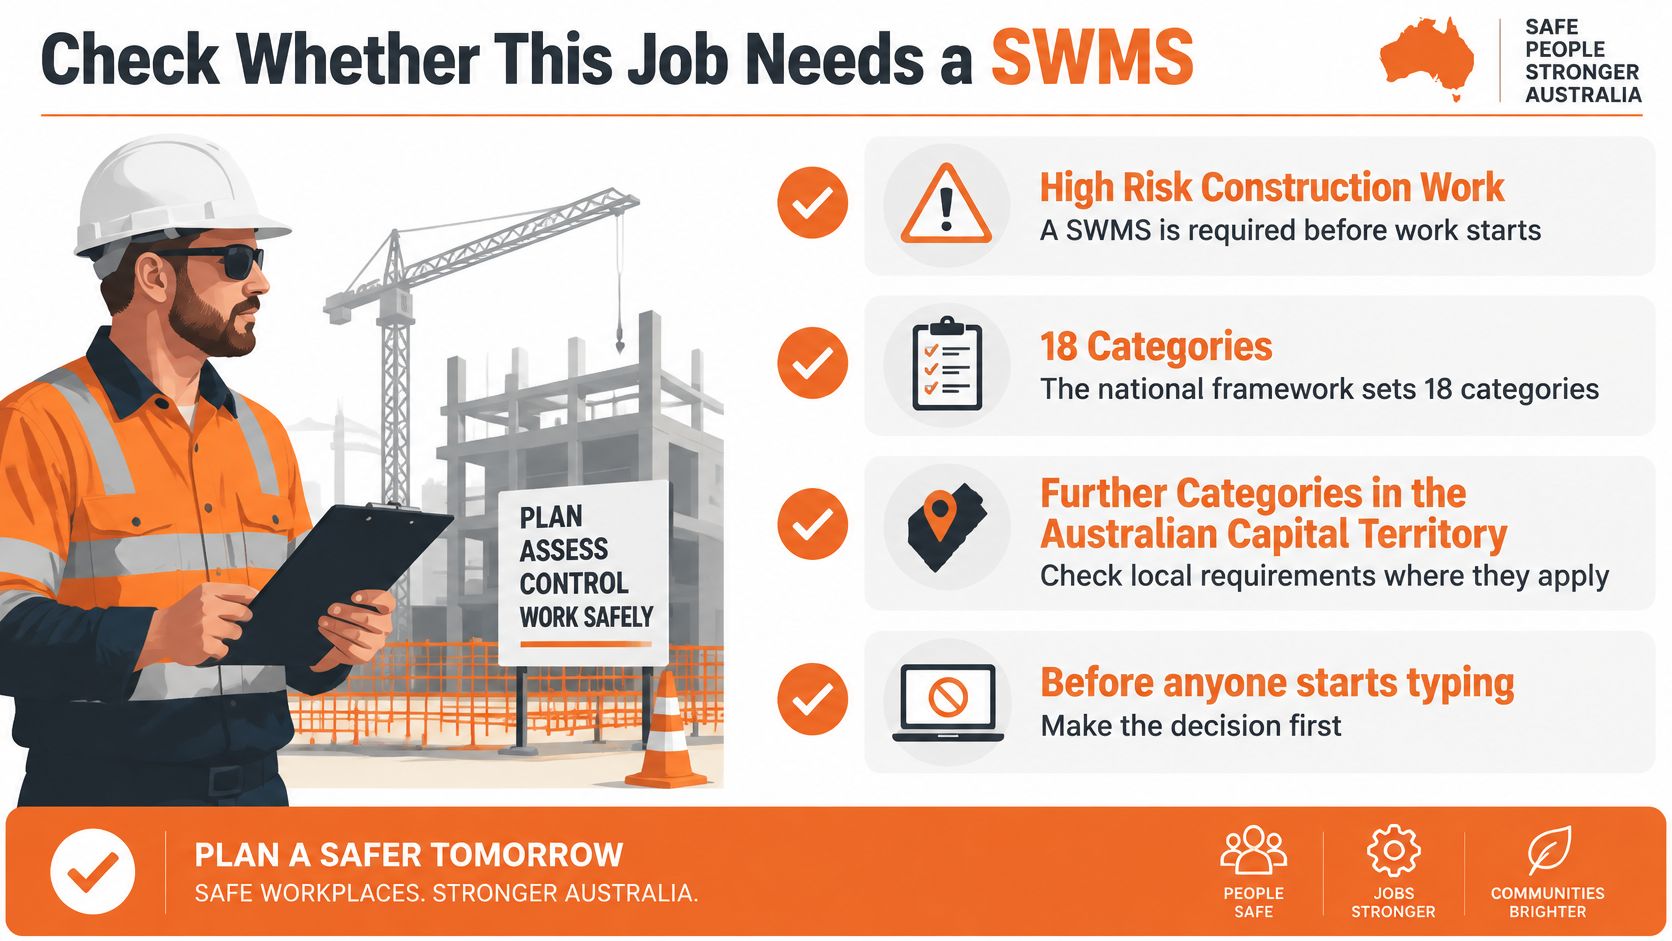
Make the yes or no decision before typing hazards into a template. A SWMS isn't a general safety form for work that feels risky. In Australia it's required for high risk construction work, and the wrong starting point creates two failures. Teams miss a mandatory SWMS for a defined category, or they issue generic SWMS documents for routine tasks while leaving the actual high risk step poorly described.
The WorkSafe Queensland guide to safe work method statements states that a PCBU must prepare a SWMS before high risk construction work starts, give it to the principal contractor, follow it during the work, review and revise it when necessary, and retain it until that work is completed. The same guidance says the national framework identifies 18 categories of high risk construction work, with additional categories applying in the Australian Capital Territory and Victoria. Confirm the wording with the state or territory regulator before relying on a national summary, because local WHS Regulation wording can differ.
Run the Decision in Order
Start with three questions, in that order. Is the activity construction work? Does it match a high risk category on this site, not just in theory? If more than one category applies, does one SWMS cover each category clearly, or does the combination need separate treatment? A crew fixing sheets at height while powered mobile plant moves below isn't dealing with one abstract risk. The SWMS has to name both exposures and show how they interact.
Don't delegate that decision to whoever found the template. The supervisor and the workers planning the sequence should test the actual method against the categories. A task title from a purchase order rarely describes the exposure. "Install cladding" doesn't say the fall height. "Excavate footings" doesn't say the trench depth. Measure it, inspect the location, then decide.
The table below isn't the full list of 18 categories. It covers named examples that help test a job quickly. Check Safe Work Australia material and the relevant state regulator for the remaining categories, and use current guidance on construction health and safety regulations as part of that jurisdiction check.
Named high risk construction work to test the job against
| High risk example | Why it triggers a SWMS | Detail the SWMS must name |
|---|---|---|
| Risk of a fall more than 2 metres | Fall from height | Edge, measured height, access and fall control |
| Demolition | Collapse and falling materials | Structure, sequence and exclusion zone |
| Asbestos disturbance | Exposure to airborne asbestos | Material, licence status and control method |
| Confined space | Atmosphere and engulfment | Space, atmospheric test and rescue arrangement |
| Trench deeper than 1.5 metres | Ground collapse | Depth, ground support and access or egress |
| Traffic corridor | Struck by traffic | Road or corridor, separation and traffic control |
| Powered mobile plant | Struck or crushed by plant | Plant type, exclusion zone and who controls movement |
| Tilt-up or precast concrete | Crush from concrete elements | Panel, cranage and exclusion zone |
Where Habit Causes Trouble
Some jobs look dangerous but don't automatically sit inside a named category. Some routine looking jobs do. Replacing a small fitting from a low platform and replacing the same fitting beside an open edge aren't the same decision. Neither are a shallow service scrape and a trench that deepens during the shift.
Practical rule: If the category depends on a measurement, record the measurement. If it depends on the location, name the location. If it depends on plant movement, name the plant and the separation method.
That discipline also stops SWMS inflation. Issuing a SWMS for every task trains crews to treat it as starter paperwork. Reserve it for the defined work, write it properly, and use the right risk process for other construction hazards. A smaller set of specific documents will be read. A folder of near identical forms won't.
What the SWMS File Must Contain
A download is only a starting point. The useful test is whether each field records this site's hazard, work step, responsible person and stop trigger. The file needs the high risk construction work, work sequence, hazards and risks for each step, control measures, implementation method, monitoring method and frequency, review trigger, person responsible for each control, worker acknowledgement, and the date a copy went to the principal contractor. Missing fields leave decisions undocumented and make it harder to verify what the crew was meant to do.
The Safe Work Australia model code of practice for construction work states that a SWMS is required before high risk construction work starts for the 18 high-risk construction work activities defined in the WHS Regulations. A PCBU must prepare the SWMS, or ensure one has been prepared, and give a copy to the principal contractor. The SWMS must identify the high risk activities, hazards and risks, control measures, and how controls will be implemented, monitored and reviewed. A hazard list alone does not provide that required chain.
The Field Set in Working Order
Put project identity at the top, then give the work method enough space to be usable. Name the PCBU, project, site area, principal contractor and exact high risk activity. Set out the work in sequence, from set-up through execution to pack-up, and place each hazard beside the step that creates it.
A field set should make site-specific decisions visible. For each control, record who is responsible, how it will be implemented, how it will be checked, and what condition requires work to stop. If a separate inspection record provides the evidence, identify it and connect it to the SWMS by date, location and revision.
SWMS contents a download still has to carry
| Element | What it must state | Wording that fails |
|---|---|---|
| High risk construction work | The exact high risk activity on this job | A generic construction task with no high risk category named |
| Work sequence | Activities in the order the crew will do them | One paragraph that does not follow the job |
| Hazards and risks | The hazard and the risk for each step | A hazard list with no link to a step |
| Control measures | The equipment or action required and who is responsible | Use PPE, follow site rules, or maintain awareness |
| Implementation | How the control is put in place before work | Controls named with no method |
| Monitoring | Who checks the control and how often | Supervisor to monitor with no frequency |
| Review | When the SWMS is revised | Review as required with no trigger |
| Responsible person | The named person for each control | The company or all workers |
| Worker acknowledgement | Evidence the crew was briefed and signed on | A blank signature block never used |
| Principal contractor copy | That a copy is given before work starts | Kept only in the subcontractor's office |
Reject Phrases That Cannot Be Checked
Reject phrases that leave the action or decision undefined. “Use PPE” does not name the item or task. “Follow site rules” does not identify the applicable rule. “Maintain awareness” cannot be checked. “Review as required” gives no review trigger. “Supervisor to monitor” names neither a person nor a frequency.
A field that accepts any answer accepts no answer. Constrain the template so generic wording is visibly incomplete.
New Zealand readers should check WorkSafe NZ requirements under the Health and Safety at Work Act 2015, where a site-specific safety plan is the closer instrument. United States readers should use a job hazard analysis under OSHA rather than applying an Australian SWMS to a different legal system. The field discipline transfers; the legal label and duty-holder language do not.
Choose Word or PDF based on how the document will be controlled. Word supports revision but allows silent overwriting. PDF preserves a signed version but makes urgent field changes harder. Either format needs a controlled version, date, author and record of superseded copies. A well-formatted file still cannot establish that the controls suit the site.
How to Complete the SWMS Before Work Starts
A SWMS copied from a similar job is a starting draft, not a completed method. Check every retained instruction against this site: access, weather, plant, subcontractor interfaces and public exposure can change which controls will work.
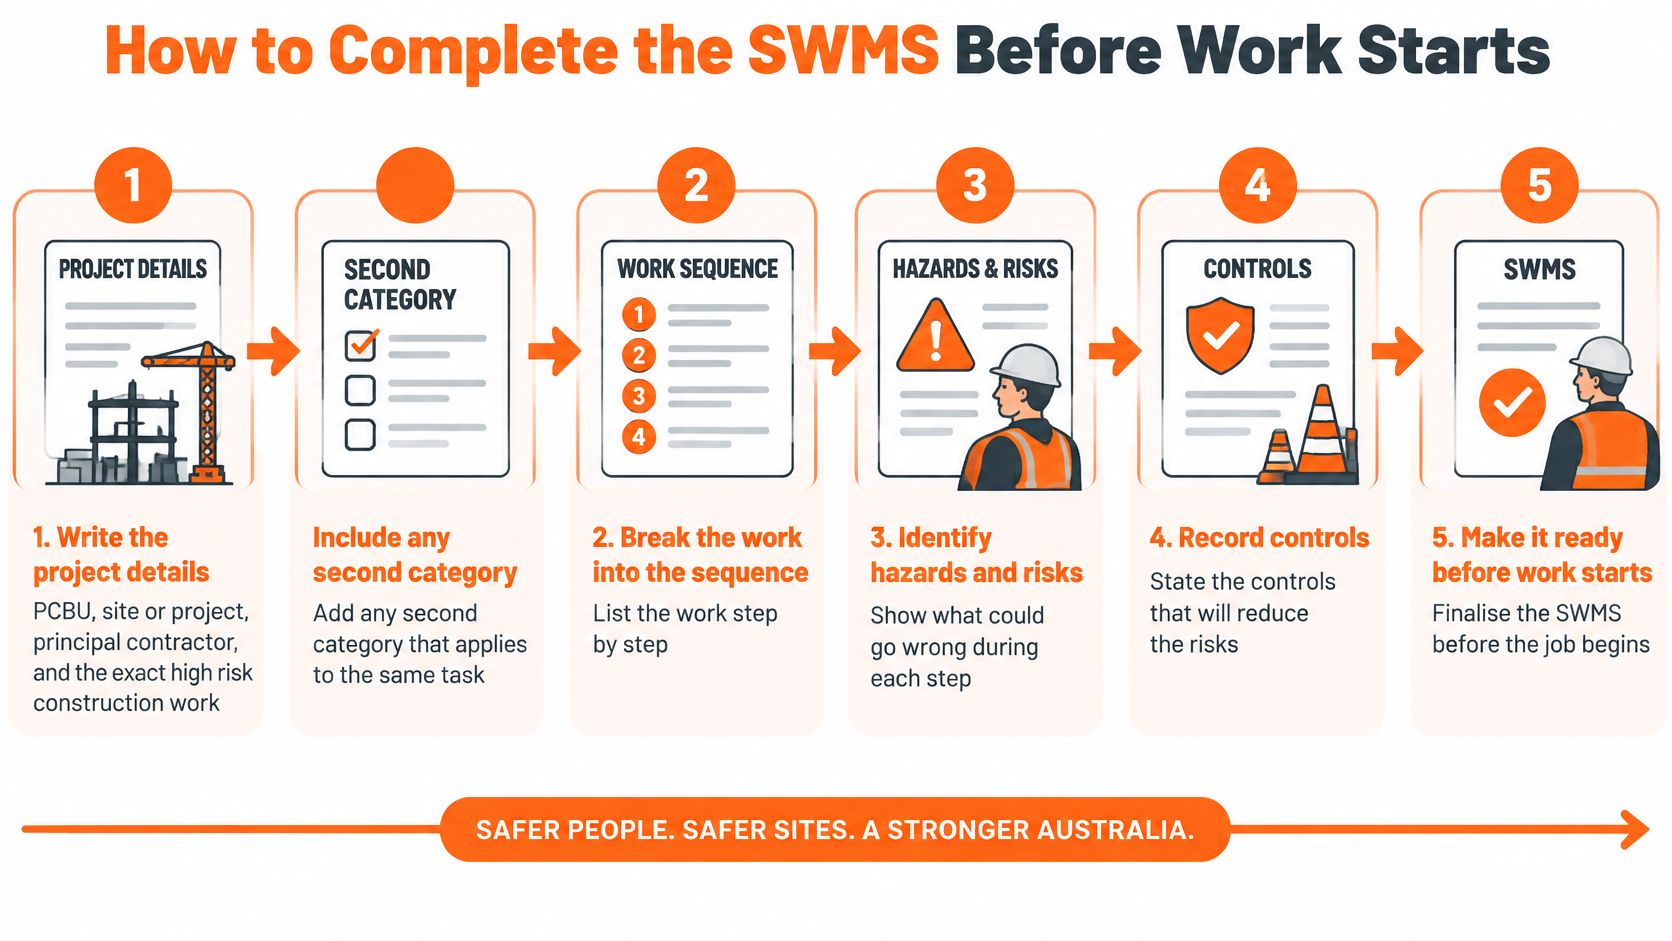
Safe Work NSW guidance on preparing a safe work method statement says a SWMS must identify the high risk construction work, its hazards and risks, and the control measures. It must also explain how those controls will be implemented, monitored and reviewed, in language the people using it can understand. Controls should give clear direction rather than leave key decisions to workers or supervisors. Use that standard to complete the seven steps below.
Steps 1 to 4 Build the Method
Write the project and duty details. Record the PCBU, site or project, principal contractor and exact high risk construction work. Include any other category that applies to the same task. For example, identify powered mobile plant or confined space work rather than burying it under a broad heading such as falls or excavation.
Break the work into its actual sequence. List each step from set-up to pack-up in the order the crew will do it. Remove steps that do not apply on this site. Add commonly missed interfaces, including deliveries, temporary removal and reinstatement of controls, and handovers between crews.
Name the hazard and risk at each step. Use plain language that a new starter on the crew can follow. For a fall risk, identify the open edge, who can reach it, when it is exposed and how a fall could occur. Separate risks to the crew from risks to other workers, visitors or the public where the exposures differ.
Write each control as a direction. Specify what must be in place, who is responsible and when in the sequence it must happen. For example, if a delivery blocks the only pedestrian route, direct the crew to hold pedestrian access at the site entrance until the load is unloaded and the route is clear. The instruction should match the actual layout and sequence on this site.
Steps 5 to 7 Make It Enforceable
Set implementation, monitoring, review and stop conditions. For each control, state how it is put in place, who checks it, when the check happens and what record shows it was done. Define the condition that stops work. Replace “regular intervals” with an observable trigger, such as set-up, shift start, an alteration or a change in weather when a clock-based interval does not fit the exposure.
Consult the workers who will do the job. Ask them to check the draft for errors in access, reach, plant movement, sequencing and manual handling. Record the discussion and any changes made, even if the method stays the same. A signature after a brief reading does not show that workers had a chance to shape the method.
Brief, sign on and hand over the copy. Brief the crew, collect worker sign-on and give the principal contractor a copy before work starts. Safety Space can hold the signed SWMS with worker sign-on. The document still needs to describe the method for this site, plant and crew.
Read each control aloud: who does what, with what, by when, checked how, and what stops the job? An unanswered question points to unfinished drafting.
Keep the document focused on the controls that apply at the exposed step. Put emergency arrangements in the SWMS when they are task specific, such as rescue from a confined space or retrieval after a fall arrest. If generic site emergency information is already controlled in the site induction or emergency plan, avoid duplicating it here.
Check the wording with the crew. Technical terms may be necessary, but connect each one to something visible on site: the edge system, trench support, isolation point or traffic device. A method built around procurement categories and management verbs gives workers little direction.
Before collecting signatures, check that the sequence is physically workable. If installing protection requires a worker to enter the exposure zone, revise the method or specify an installation sequence from a safe position. Resolve the work method first.
A Worked Fall Over Two Metres Example
Say a carpentry crew is sheeting a first floor edge on a residential build. The open edge creates a fall of more than 2 metres. The crew could write "working at heights, fall, install edge protection, supervisor to monitor" in one row. That sentence mentions the category but gives the crew almost nothing to execute or verify.
A better SWMS uses four steps only. It stays close to the work, names the control at the point of exposure and treats removal of protection as high risk work in its own right. Copy the level of detail, not the words. Heights, products, access and names must come from the actual site.
Fall over 2 metres SWMS extract
| Job step | Hazard and risk | Directed control | Monitor and stop trigger |
|---|---|---|---|
| Land sheet packs | Struck by a falling pack | Named dogger or spotter and a marked exclusion zone before the lift | Stop the lift if anyone enters the zone |
| Install edge control | Fall more than 2 metres at the open edge | Named competent person installs the specified edge system before work at the edge | Stop if any component is missing or the edge has changed |
| Fix sheets at the edge | Fall, or tools falling on people below | Workers stay behind the installed control and loose tools are tethered or otherwise controlled | Stop if the control is removed to reach the work |
| Strike the edge control | Fall during removal | Removal is a separate step from a safe position with the area below cleared | Stop if people remain below or the removal sequence changes |
Landing Packs and Setting the Edge
Landing sheet packs creates a struck by risk before sheeting starts. The SWMS should identify the lift path, landing point and exclusion zone. It should name the dogger or spotter who controls the lift and state that the zone is marked and cleared before the pack leaves the truck or ground stack. The stop trigger is simple. If anyone enters the zone, the lift stops.
Edge installation comes next, before general work at the edge. Name the actual system being used and the competent person installing it. State where installation starts, how the installer stays protected during installation and who inspects the completed run. Missing clamps, incomplete rails, damaged components or a changed edge geometry all stop sheeting work. "Installed to manufacturer instructions" can support the control, but it doesn't replace naming the system and installer.
Access to the first floor needs the same specificity. Don't write "use ladder safely" and move on. State the access point, who can use it and how materials are prevented from being carried in a way that removes hand contact. Crews that still use ladders for limited access tasks can compare their local rules with ladder tips from Pine Country Window Cleaning, then apply the stricter site and Australian regulatory requirements. For task planning, a focused safe work method statement for working at heights helps separate access from edge work instead of merging both into one vague row.
Fixing Sheets and Striking Protection
During fixing, workers stay behind the installed control. That sentence must survive the awkward sheet, the short reach and the temptation to remove a rail "for two minutes". If the method can't be completed from behind the control, the method changes. It doesn't become an unwritten exception. Loose tools and offcuts also need control so they can't fall onto people below. Tether tools where tethering suits the task, use tool belts or contained laydown areas, and keep the drop zone below clear.
Striking the edge control is a separate step, not pack-up housekeeping. Removal happens from a safe position, in the stated order, with the area below cleared. The SWMS should say who authorises removal and what permanent or next stage control replaces it. If another trade still needs the edge, removal waits or a replacement control goes in first.
The most dangerous sentence in a height SWMS is often missing. It is the sentence that says what happens when the control makes the task harder.
Weather changes the example without changing the category. Wet sheets can reduce footing, wind can turn a sheet into a sail, and a new subcontractor below can change the drop zone. The review trigger is therefore changed weather, changed plant, a new crew at the edge or altered access. It isn't the next calendar month. Stop, revise the affected rows, brief the change and get the altered version signed before work resumes.
This example also shows what to leave out. It doesn't need a general essay on falls, a full PPE catalogue or controls for plant that won't be used. It needs four executable steps and enough detail for a supervisor to see, within seconds, whether the site matches the document.
Gate the Start, Brief the Crew and Keep the Record
A completed SWMS file does not prove the site is ready. Before work starts, check that it names the exact high risk construction work, links each job step to a specific hazard and risk, describes the control in workable terms, and sets out how controls will be implemented, monitored and reviewed. It must also give workers a clear trigger for stopping work. Any gap means the site or document needs correction before the exposed step begins.
The Queensland Electrical Safety Office guidance on SWMS for energised electrical equipment says work must stop if it is not being conducted according to the SWMS, and may resume only after controls are implemented and reviewed. Its electrical-specific requirements also call for the SWMS to identify the electrical work, hazards and risks, controls, and how controls will be implemented, monitored and reviewed, with the relevant risk assessment included. Apply the stop-and-review discipline to other work too, while checking which electrical details apply to the task.
Brief the People Doing the Task
Brief the crew against the final, current version before the first exposed step. Workers need to connect each relevant row to the physical control on site: the edge protection, trench, plant route, isolation point or exclusion zone. If the document says one thing and the site presents another, resolve the mismatch before starting.
Use the briefing to test whether the sequence and controls make sense to the people doing the work. Record consultation changes with the SWMS version they affect, then capture each worker's sign-on to that final method. Include late starters and replacement workers; a leading hand's signature does not confirm that the rest of the crew was briefed. A toolbox talk about the work or a changed interface can support discussion and attendance records, but the SWMS record should identify the version covered.
Control the Version and Retention
Keep the signed SWMS with the project record; do not save over it. A blank or generic SWMS template free download cannot show which version workers saw, who changed a control or whether the current method matches the site. Make the version number, date, author, briefed crew and superseded status easy to identify. Remove obsolete field copies when a revision is issued.
The Safe Work Australia construction code document says the SWMS must remain available to workers performing the work and for inspection until the work is complete, or for at least two years after a notifiable incident. Store it by project so the record can be retrieved during the job and after an incident or regulator visit.
Recheck affected rows when plant, sequence, location, weather, subcontractors or work interfaces change. Revise the controls if the new condition changes the method, then record the current version. Avoid cosmetic revisions: if the physical control has not changed, unnecessary version changes can make workers less attentive to real updates.
If the site has changed and the SWMS hasn't, stop and resolve the mismatch before the exposed step continues.
Monitoring records should show what was checked, when, what defects were found and who closed the corrective actions. A dated check against named controls gives a clearer record than a tick beside “SWMS followed.” Repeated defects at the same control point call for a review of the equipment, sequence or supervision, not just a louder instruction.
Check local requirements with the relevant state or territory regulator, using Safe Work Australia for model material. Construction code wording may not answer every jurisdiction-specific question, particularly where electrical requirements or local regulator expectations apply.
Start only when the work method and site conditions align, and the required records are in place. If either the document or the physical controls need correction, resolve that first.
Keep SWMS versions, sign-on and corrective-action records together under the project. Safety Space offers SWMS and JSAs with worker sign-on, document control and site records to support that process.
Ready to Transform Your Safety Management?
Discover how Safety Space can help you implement the strategies discussed in this article.
Explore Safety Space FeaturesRelated Topics
Safety Space Features
Explore all the AI-powered features that make Safety Space the complete workplace safety solution.
Articles & Resources
Explore our complete collection of workplace safety articles, tools, and resources.